When it comes to the peripherals, people these days consider wireless options. Nowadays, you have several wireless devices like Bluetooth headphones, Bluetooth mice & keyboards, etc.
All such devices require connecting to a PC/Laptop with the help of Bluetooth connectivity. If you have a Bluetooth-enabled laptop or a computer, you might have paired many Bluetooth devices.
While there’s no difficulty in leaving Bluetooth devices paired to your computer, sometimes you may want to clean up the Bluetooth settings and remove the devices that you no longer use. Removing the paired devices will ensure your PC never connects to the Bluetooth device automatically.
Removing Bluetooth devices on Windows 11 is pretty easy, but the operating system can sometimes suffer a glitch and refuse to remove a Bluetooth device. So, you need to know how to remove Bluetooth devices on Windows 11.
How to Remove Bluetooth Devices on Windows 11
So, if you want to remove a Bluetooth device from your Windows PC or cannot remove one, continue reading the guide. We have shared some simple ways to remove Bluetooth Devices on Windows 11. Let’s get started.
1. Remove Bluetooth Devices from Settings
The easiest way to remove Bluetooth devices on Windows 11 is via the Settings app. Here’s how to remove Bluetooth devices using the Settings app on Windows 11.
1. Click on the Windows 11 Start button and select Settings.
2. When the Settings app opens, switch to the Bluetooth & devices tab.

3. On the right side, click on Devices.

4. Now, you will be able to see all paired devices.

5. Click the three dots next to the Bluetooth device name you want to remove and select Remove device.

That’s it! This will immediately remove your linked Bluetooth device. This is the easiest way of removing a connected Bluetooth device on Windows 11.
2. Remove Bluetooth Devices with the Device Manager
If, for some reason, you are unable to remove Bluetooth devices from the Settings app, you can choose to remove them from the Device Manager. Here’s how to use the Device Manager to remove Bluetooth devices on Windows 11.
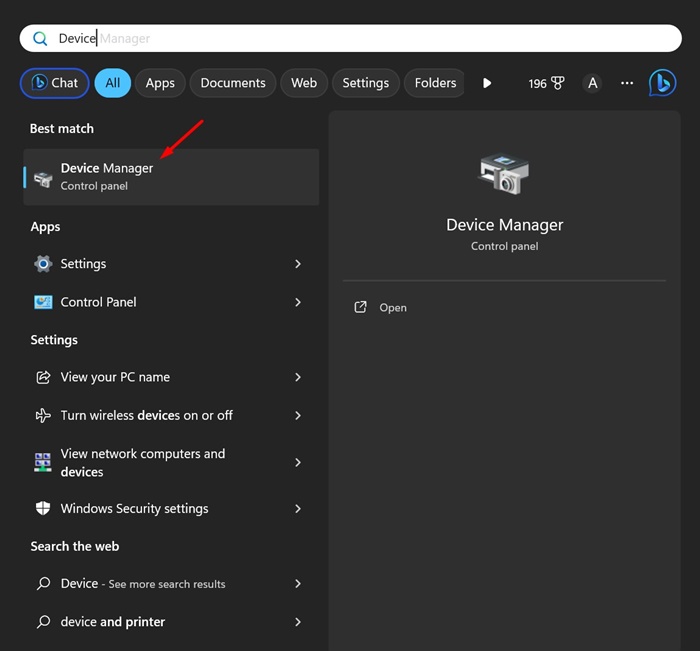
1. Type in Device Manager on the Windows 11 search. Next, open the Device Manager app from the list of best-match results.
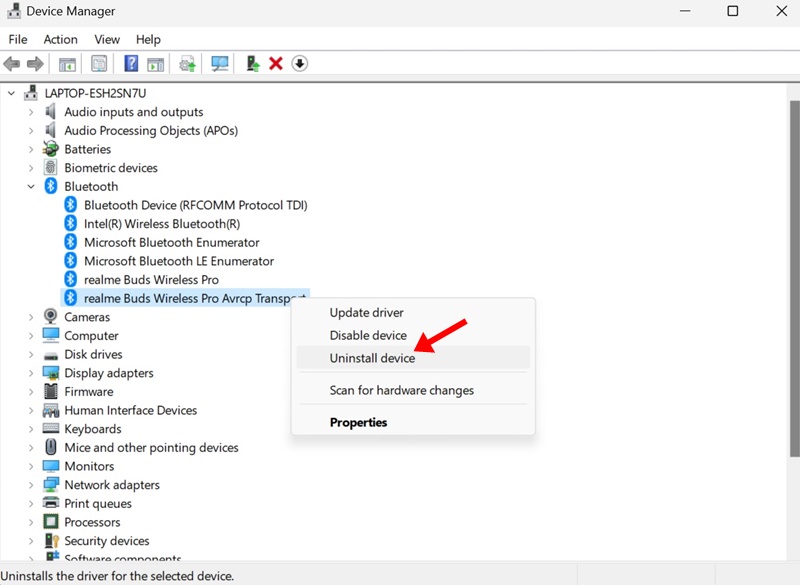
2. When the Device Manager opens, expand the Bluetooth tree.

3. Now, right-click on the Bluetooth device you want to remove and select Uninstall Device.
4. On the Uninstall Device confirmation prompt, click Uninstall.

That’s it! This will instantly remove the Bluetooth device from Windows 11 PC.
3. Remove Bluetooth Device using the Command Prompt
If you feel comfortable with the Command Prompt, you can follow this method to remove a Bluetooth device. Here’s how to use the Command Prompt to remove a Bluetooth device on Windows 11.
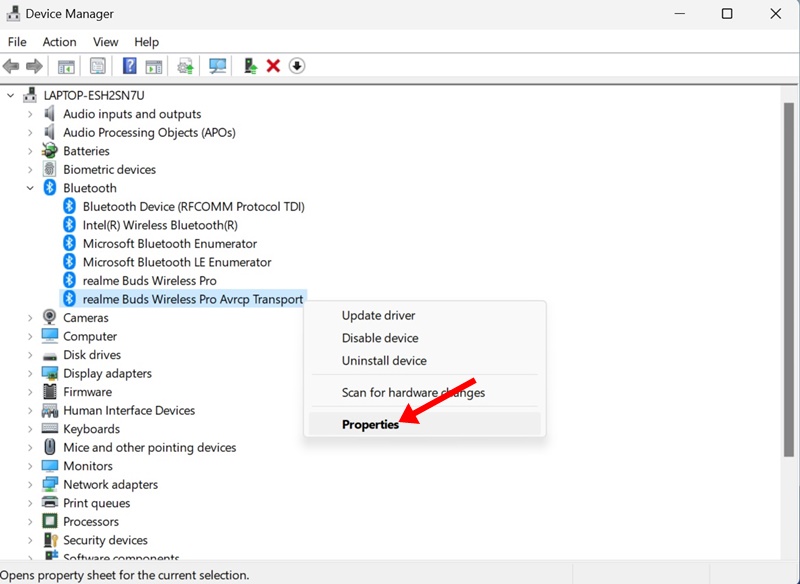
1. Open the Device Manager. Right-click on the Bluetooth device you want to remove and select Properties.
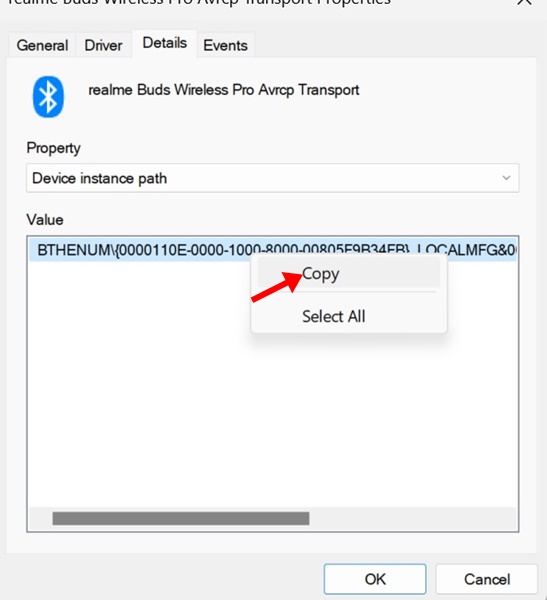
2. Switch to the Details tab and select Device Instance Path on the Property drop-down.

3. Right-click on the Value and select Copy.
4. Next, open the Command Prompt with admin rights.
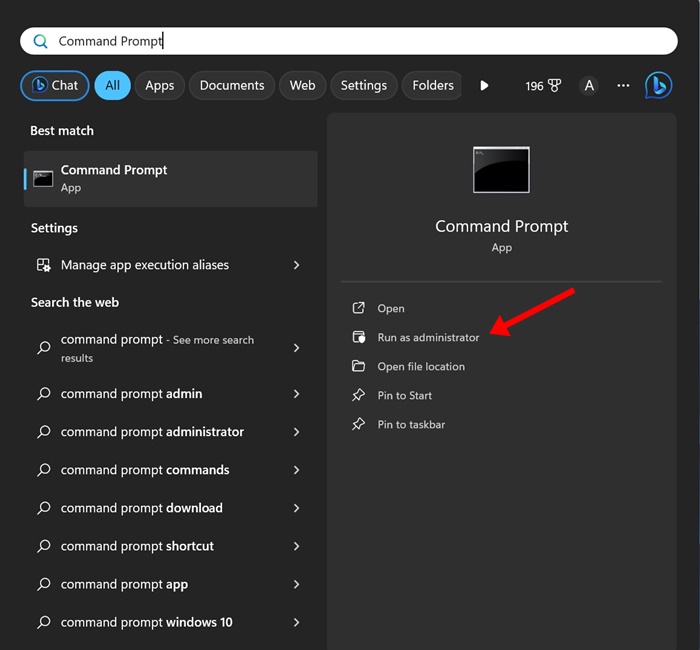
5. Next, execute the command given below by replacing the ‘DEVICE_ID’ with the value you’ve copied before.
pnputil /remove-device “DEVICE_ID”
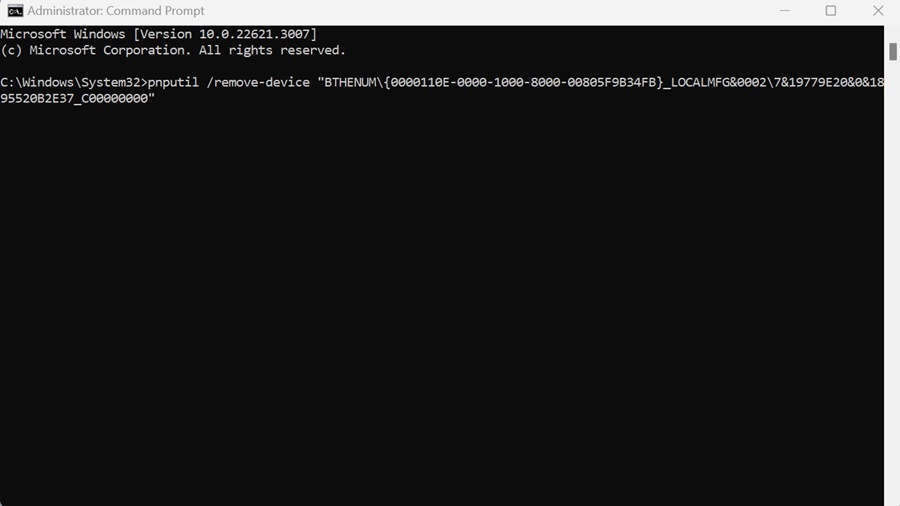
6. Upon successful execution of the command, you will see the ‘Device Removed Successfully‘ message. This indicates that the Bluetooth device has been removed.

That’s it! You can follow the same steps to remove as many Bluetooth devices as possible.
So, these are the three best ways to remove Bluetooth devices on Windows 11 computers. Let us know if you need more help removing Bluetooth devices in the comments below.
