
Related Articles


It’s like adding a little magic to a still image by turning it from a plain old photograph into a winter wonderland with the entrancing charm of snow falling. View your picture as a canvas ready to be painted with a dreamy snow globe of memories, transforming an ordinary image into a captivating work of art inspired by a snowy spectacle. Adding falling snow to a photo produces a gripping narrative where the fresh, frigid air dances with exquisite snowflakes, enticing us to step into a world trapped in the beauty of the moment, just as a master storyteller crafts tales that take us to new places.
We’ll explore the intricacies of incorporating falling snow into your photo in the pages that follow, breaking down each step as though they were a fascinating novel’s chapters. We will set out on an expedition where pixels become snowflakes and your photo becomes a testimonial to the magic you’ve weaved into it, starting with choosing the appropriate tools and learning the subtleties of lighting. So, grab your metaphorical snow globe, shake it up with imagination, and allow the enchantment of falling snow to breathe life into your favourite photographs. Get ready to see your pictures turn into a wintry masterpiece that would make Jack Frost envious.
Presently, there are many software and applications that can bring our dreams of a snowy or stormy winter day to reality, incorporating a range of processes to give us the desired outlook. Among the best applications are Photoshop, ZMO Photo Editor, and ZMO Background Changer.
How To Add Falling Snow To A Photo Using Photoshop
Photoshop’s snowfall effect is a compelling technique that turns an ordinary image into a wintry paradise. You can realistically add snowflakes to your shot using Photoshop’s flexible tools, transforming it into a peaceful scene of snow falling gently.
Let’s jump right in.
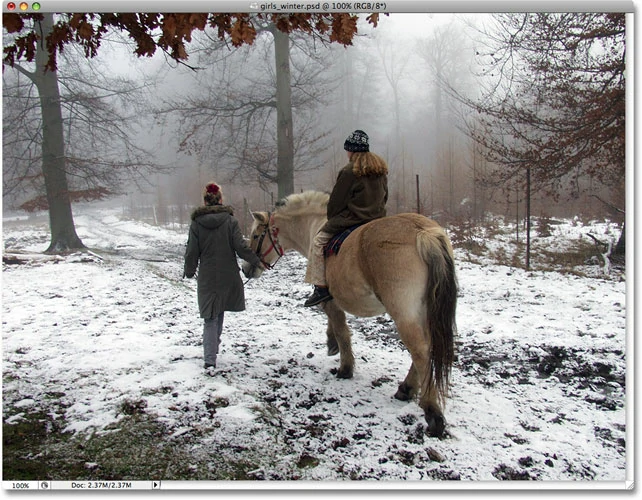
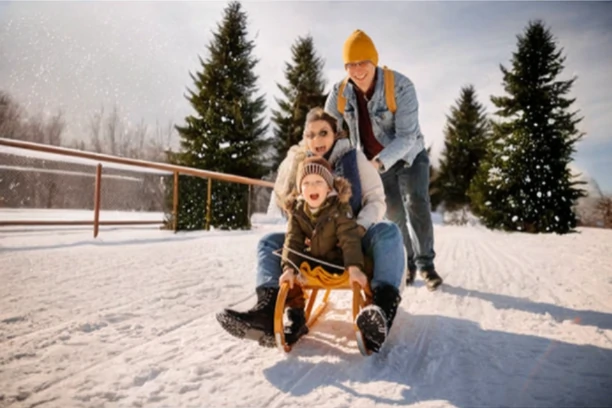
This is the image we’ll be using in the guide:
Step 1:
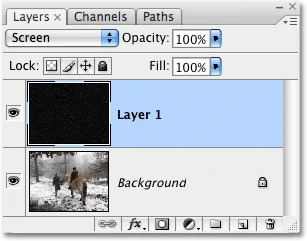
Firstly, initiate the process by introducing a fresh blank layer above our existing photo. Locate the New Layer icon situated at the bottom of the Layers palette. Positioned as the second icon from the right, adjacent to the Trash Bin, click on it to create a new layer.
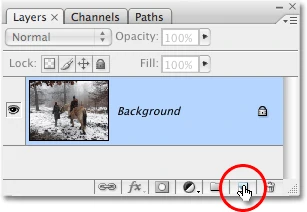
Since the layer we just added is blank, nothing will appear to have happened in the document window. But we can notice that we now have a new blank layer, which Photoshop has named “Layer 1” for us automatically, sitting right above the Background layer:

Step 2:
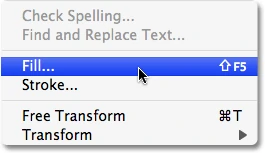
Let’s fill the newly created layer with black now that it exists. In most cases, Photoshop has already chosen our new layer for us, so we may proceed without having to do anything to it. The fact that “Layer 1” is highlighted in blue indicates that it is the selected layer. We’ll use Photoshop’s Fill command to fill the layer with black. Navigate to the top of the screen’s Edit menu and select Fill:
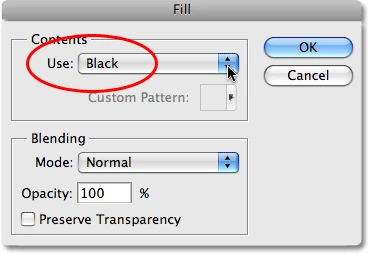
Access the Fill command dialog box by following these steps. Within the dialog box, locate the Contents section positioned at the top. Here, you specify the colour you intend to use for layer filling. Opt for black from the available options, and subsequently, click OK to exit the dialog box.
Filling “Layer 1” with black obscures our photo because it is positioned above it on the Background layer. At this point, the document window is completely black.
Step 3:
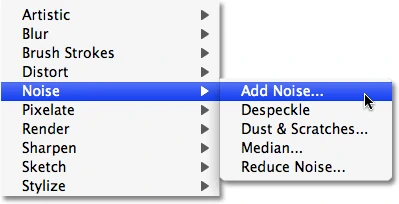
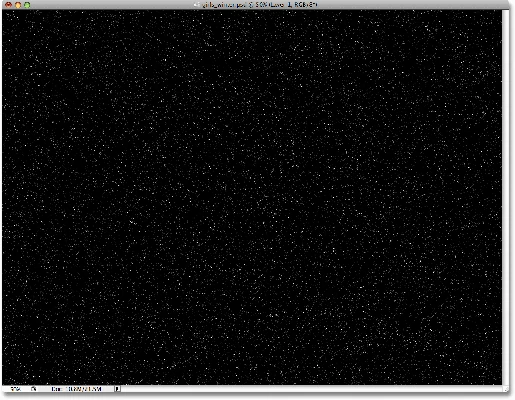
Introduce a touch of texture to this layer, paving the way for our simulated falling snowflakes in a quick and straightforward process. Photoshop conveniently provides a dedicated filter for introducing noise to an image, aptly named the Add Noise filter. Navigate to the Filter menu positioned at the screen’s summit, opt for Noise, and subsequently select Add Noise:
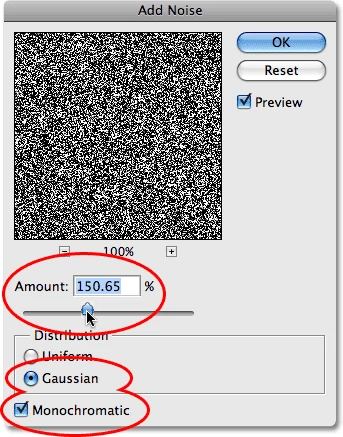
Open the dialog box for the Add Noise filter and use the centre Amount slider to change the noise intensity. Aim for a significant amount—roughly 150% or more—without requiring any particular figures. To create black and white noise dots rather than the typical coloured ones, use the monochromatic option when you choose the Gaussian option at the bottom.
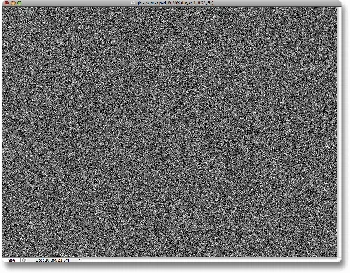
The photo should present a similar picture below after clicking “OK.”
Step 4:
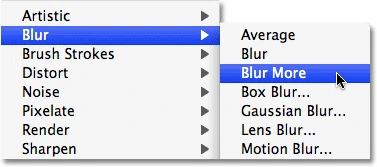
Blurring the noise will soften it and make it smoother. It will also cluster some of the dots together so that the snowflakes have different sizes and forms. Even though the Photoshop Gaussian Blur filter is often used for its controllability and simplicity, there is a more straightforward option that may be utilised for this effect. Navigate to the Filter menu, select Blur, and after that, select Blur More:
Step 5:
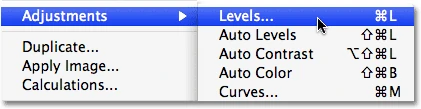
Our goal is to make our image more like snowflakes than chaotic clutter. Use Photoshop’s Levels command to accomplish this. Go to the Image menu, choose Adjustments, and then select Levels.
In Levels, adjust the white slider left for snowflake clarity and brightening noise. For noise reduction, drag the black slider right, darkening and eliminating noise areas until pure black.
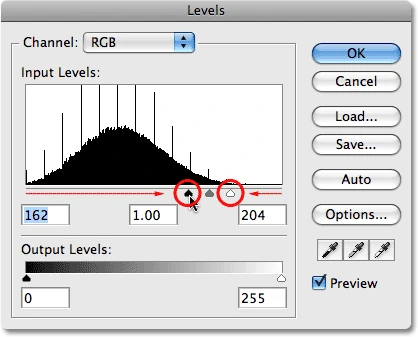
Click OK to close the Levels dialogue box after dragging the dark slider to the right until enough noise has been eliminated to make what’s left look more like snow. This is how your image should now appear:
Step 6:
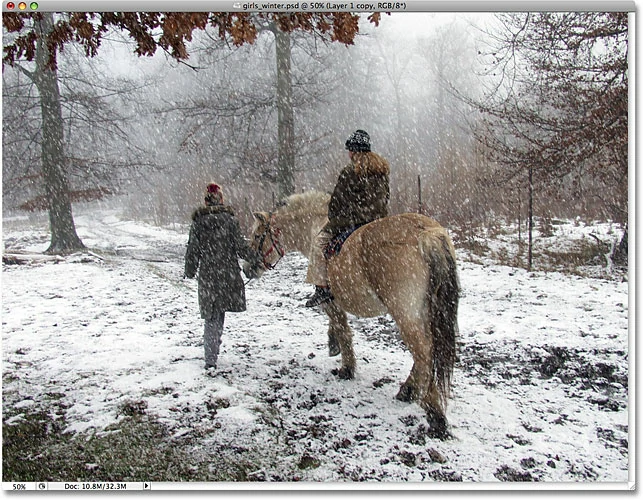
While our winter scene progresses, an issue arises. The generated white specks for snowflakes obstruct the view of our photo. To rectify this, use Photoshop’s layer blend modes. With “Layer 1” selected, access the Blend Mode option with default as “Normal” Select the Screen blend mode from the list to reveal the photo beneath the snowflakes.
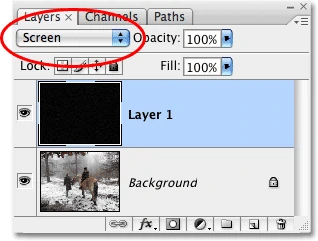
Setting “Layer 1” to the screen blend mode causes pure black areas to vanish, unveiling the photo on the background layer. Meanwhile, the white snowflakes remain visible. A glance at the document window confirms that the photo is now distinctly visible behind the delicately falling snowflakes. We should have something like this:

Step 7:
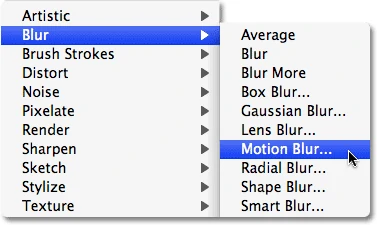
Use Photoshop’s Motion Blur tool to add motion to our snowflakes, which currently appear stiff and fixed to the image. Navigate to the Filter menu, pick Blur, and then opt for Motion Blur.
To mimic the direction in which snowflakes fall, set the Angle parameter in the Motion Blur dialogue box to about -65°. For a soft motion effect that gives the snowflakes in the picture a suggestion of movement, adjust the distance setting below to about 8 pixels.
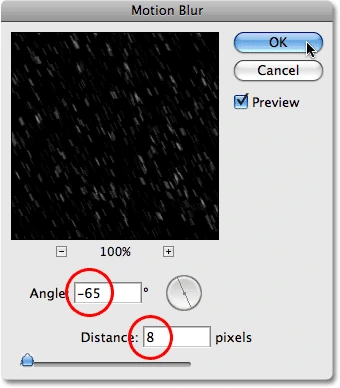
Your falling snowflakes should now appear more realistic when you click OK to close the dialogue box.

Step 8:
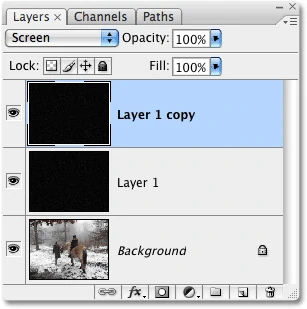
Make a second layer by copying “Layer 1”; this layer will have larger snowflakes to give our falling snow more depth. Press Ctrl+J (Windows) or Command+J (Macintosh) to quickly access the Layer menu and select New, Layer via Copy. The Layers palette now displays the duplicated layer, “Layer 1 copy,” above the original.
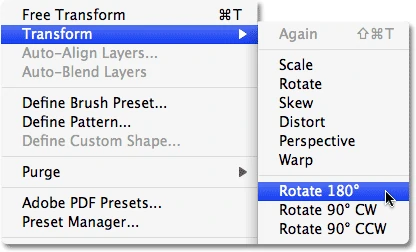
Step 9:
Turn the new layer 180 degrees to hide the use of similar snowflakes. Pick “Layer 1 copy” and then go to the Edit menu. From there, pick transform, and finally rotate 180°.
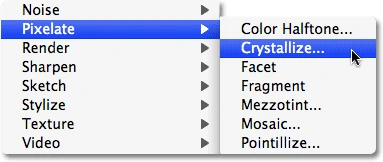
Step 10:
Navigate to Filter, select Pixelate, and then opt for Crystallise.
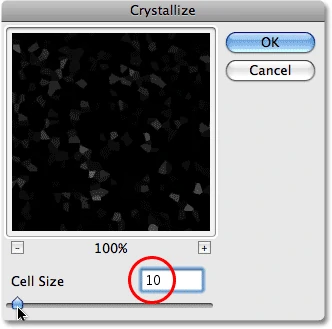
Access the Crystallise filter in Photoshop, dividing the image into cells. Adjust the cell size, typically starting with the default of 10. Further refinements will enhance the snowflake effect.
Click OK. The photo now blends small and larger white shapes, resembling falling snowflakes in motion.
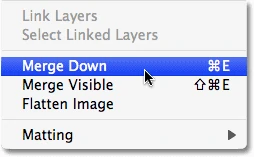
Merge top layers; observe in the Layers palette, combining two snowflake layers into “Layer 1.”
Our final result should look like this:
And that’s it! That’s how you use Photoshop to realistically add falling snow to a photograph!
How To Add Falling Snow To A Photo Using ZMO AI Background Changer
Unlike the complicated manual processes of Photoshop, ZMO AI generative background takes a quiker, more user-friendly approach to solving the problem of backgrounds, snow falling inclusive. Now, isn’t that just wonderful? We have carefully listed out the practical steps to follow to achieve the best results:
Step 1:
Firstly, we will go to ZMO’s Photo Editor workstation and login or sign up. It should appear like this:

Step 2:
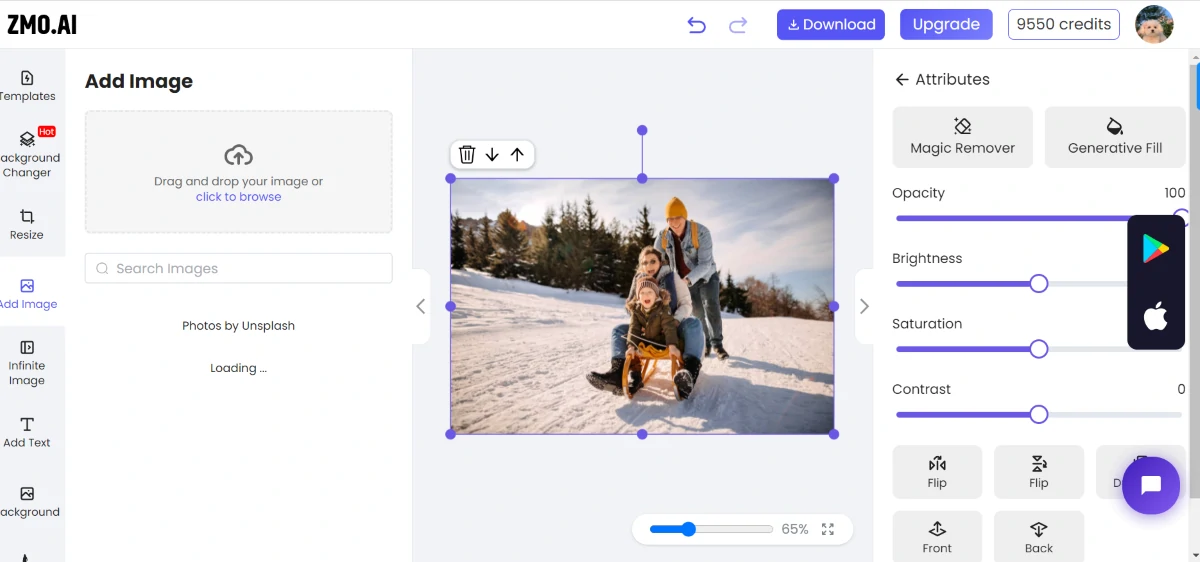
The next step is to upload our image to be edited. Ours will be the stock photo below:

Step 3:
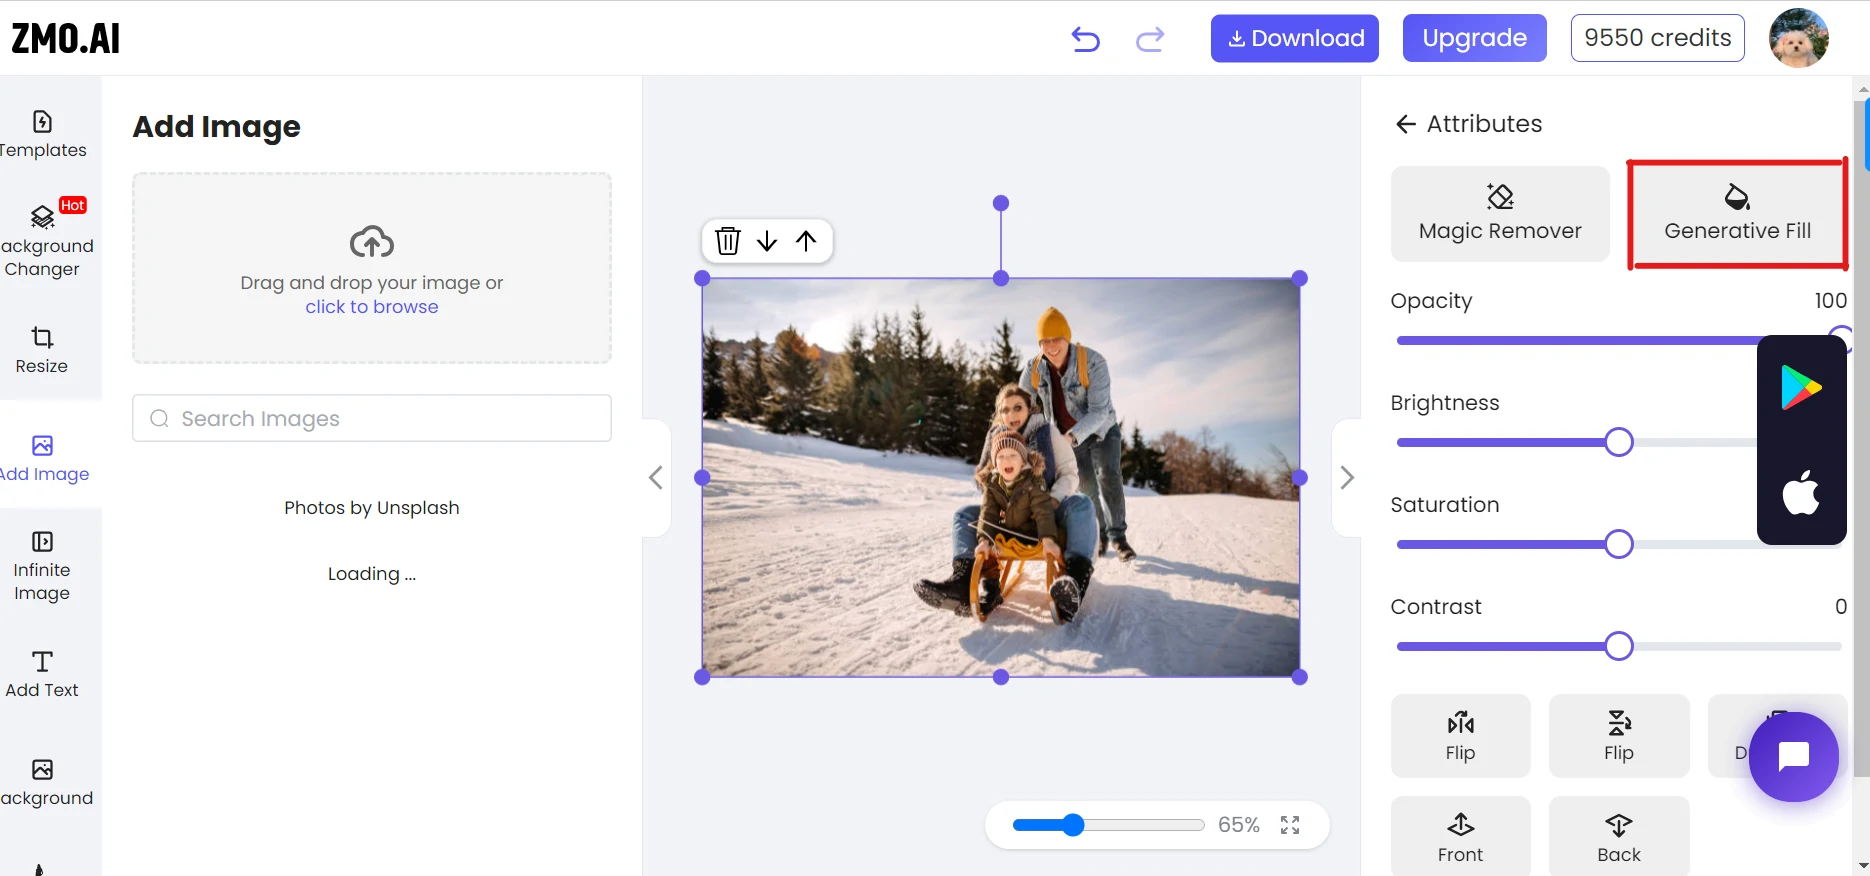
After uploading, we should see a page similar to this:
Click on the icon “Generative Fill.”
Step 4:
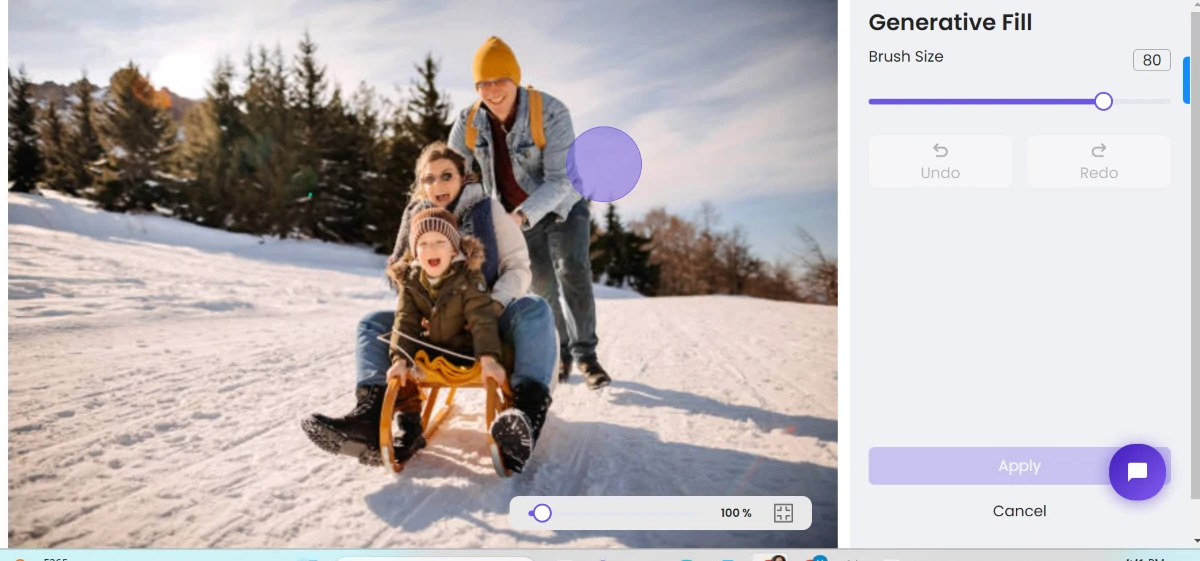
The next page will appear like this:
Step 5:
Select the appropriate brush size and proceed to paint the areas you want to have generatively filled with this multifunctional AI command.
Step 6:
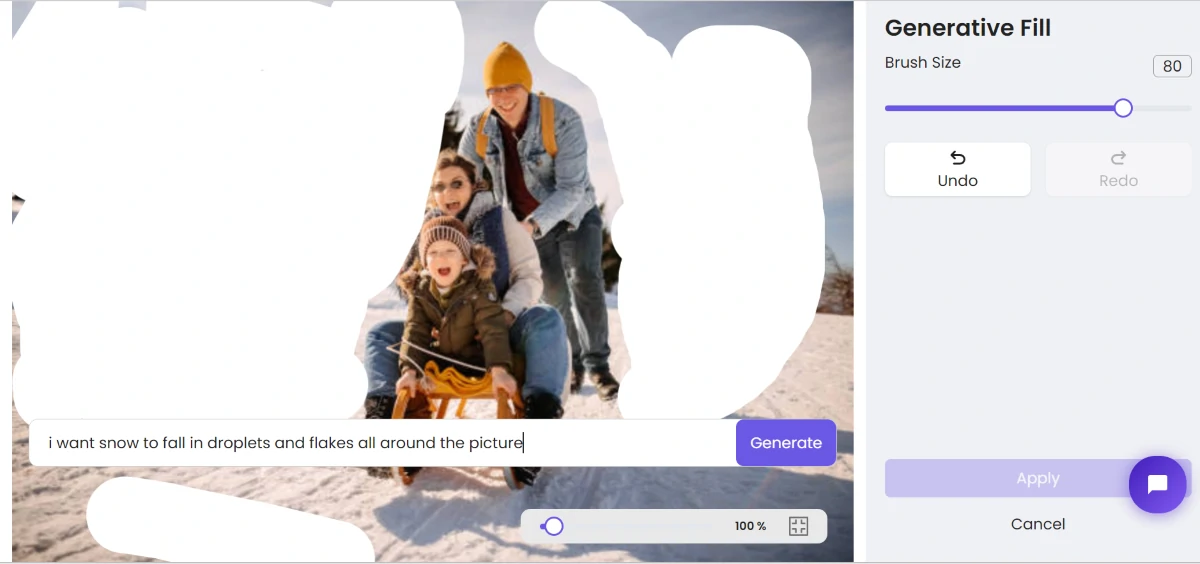
Once the areas have been highlighted, proceed to give them a special command. This command should be what you desire the photo to have, so our command was “I want snow to fall in droplets and flakes all around the picture.”.
Remember, you can be creative with your commands; don’t limit yourself. Think outside the box!
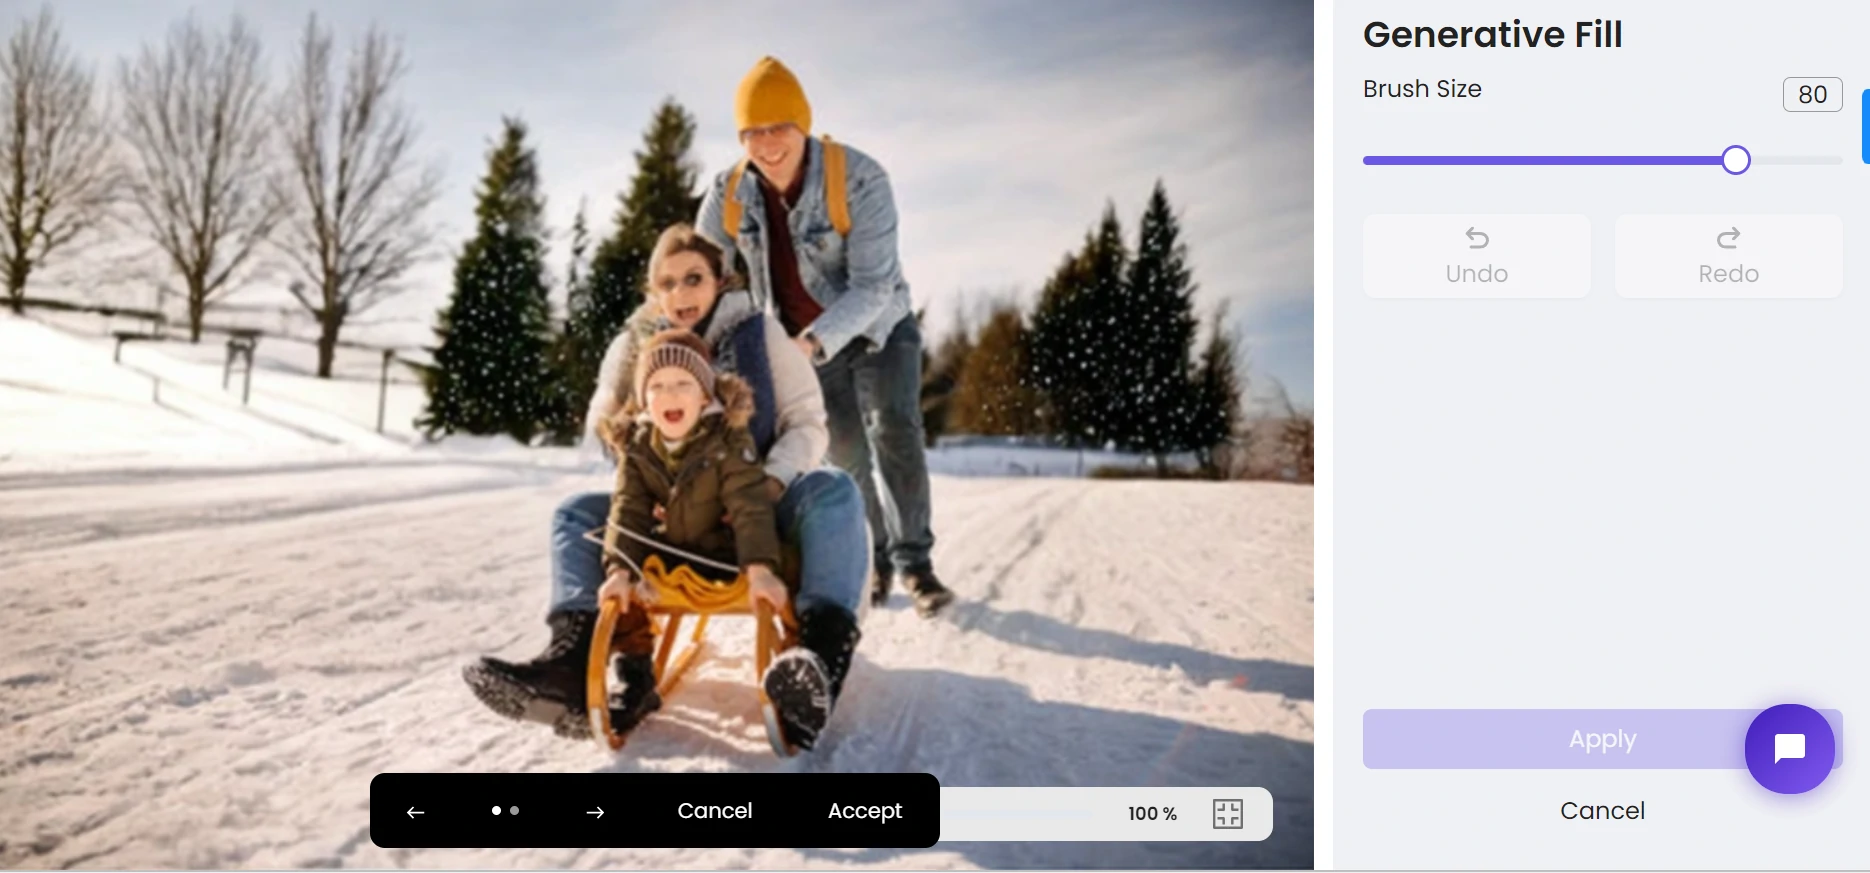
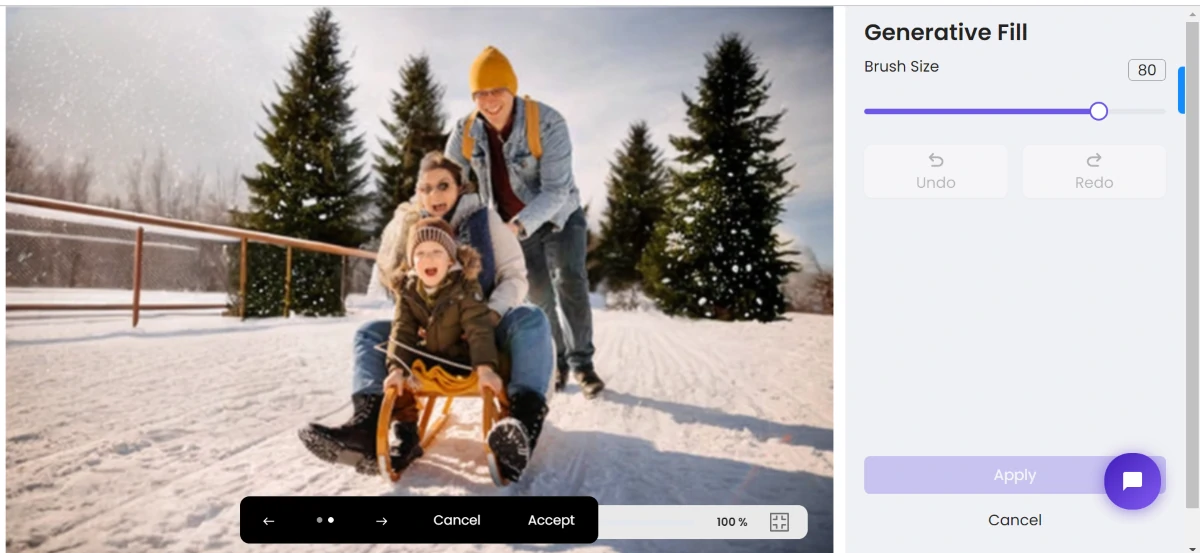
Step 7:
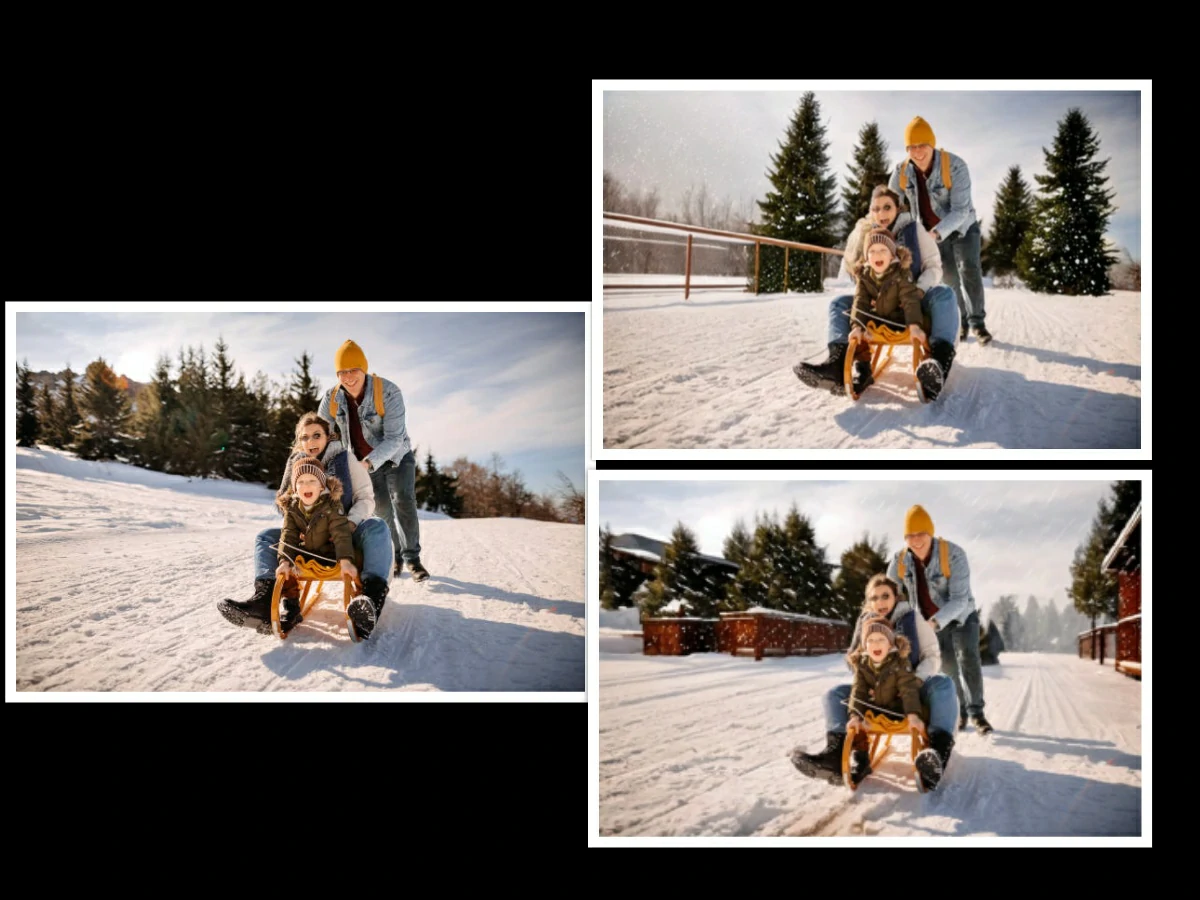
The generative AI will present two results, which you can either “Cancel” or “Accept”
This is the first one.
This is the second one.
After accepting it, it takes you back to the workstation for further editing, or you can download the picture at this point.

Here are the downloaded pictures:

Comparison:
Conclusion
When snow falls on a picture, it transforms the still image into a beautiful winter landscape. It happens like a magical process. The tutorial walks through creative processes, from the first canvas preparation to the subtle Photoshop stages, and ends with a beautiful snowfall effect.
If you decide to use ZMO AI Background Changer or Photoshop, the end result is a breathtaking winter wonderland recorded in pixels. You can always begin your visual adventure with ZMO, so you can embrace an arsenal of photo editing features at your disposal and observe your images turn into magical winter masterpieces.
