Have you just installed a new SSD on your PC, but the internet is not working afterward? Don’t worry – you are not alone in facing this problem.
Internet problems with new SSDs are common but can be easily fixed. You just need to find the root cause and fix it.
What causes internet problems with new SSDs?
After installing a new SSD, you may experience various problems like slow internet, frequent disconnections, or internet not working at all.
All these things are usually linked with pending driver installations, pending or corrupted SSD drivers, etc.
How to Fix Internet Problems with New SSD?
Although the actual reason for internet problems after installing a new SSD is unknown, you can try these troubleshooting techniques to fix the problem.
1. Restart your computer
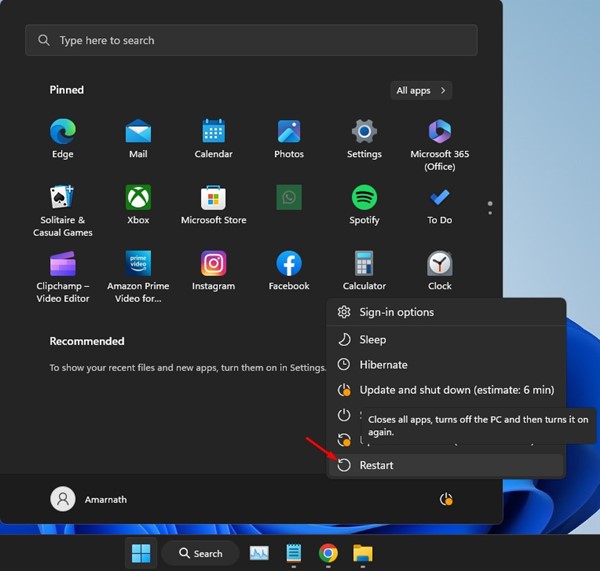

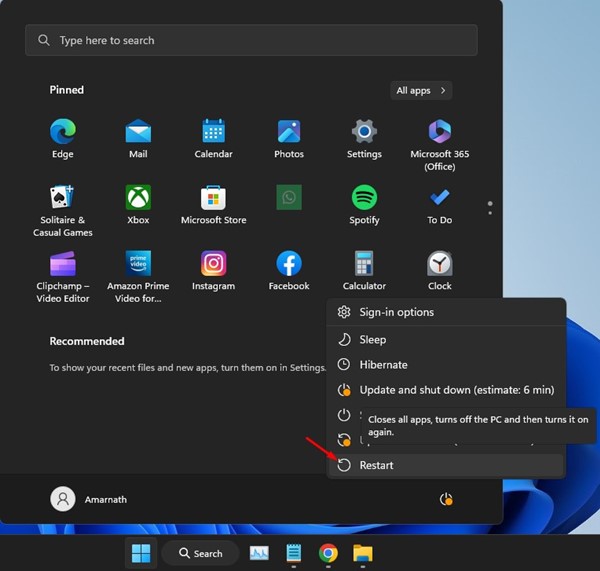
Restarting your PC, especially after installing new hardware, is essential. Restarting refreshes the operating system, resets the network settings, and reloads all needed drivers.
If all these things malfunction, you may experience internet issues. Your best bet is to restart your Windows PC and see if it helps.
2. Check if your internet is working
If an internet problem appears after installing a new SSD, it’s important to check whether there’s actually a problem triggered by the SSD installation or if it’s just that the internet itself is not working.
You can connect your phone to the same WiFi network and check if the internet works. Doing so will help you pinpoint the actual cause and avoid unnecessary troubleshooting.
3. Update the Network Drivers
Updating the network drivers should be next your list as it will help you regain access to the internet by eliminating the compatibility issues.
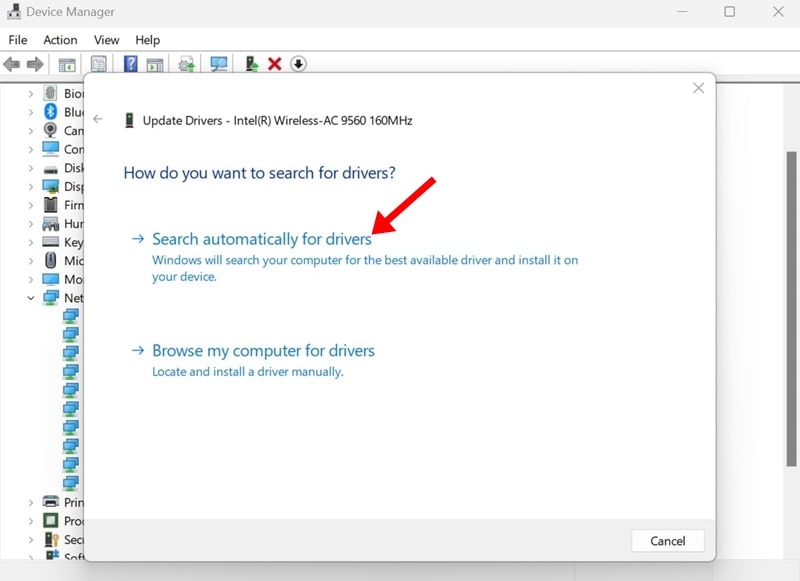
Sometimes, internet problems you get after installing a new SSD are just because of compatibility issues. You can eliminate such problems by updating the network drivers from the Device Manager. Here’s what you need to do.
1. Open Device Manager from the Windows Search.
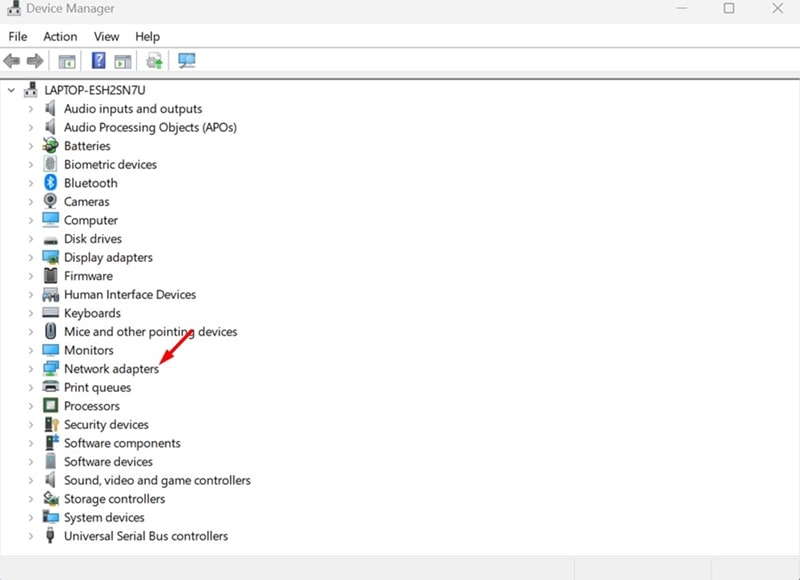
2. When the Device Manager opens, expand the Network Adapters tab.

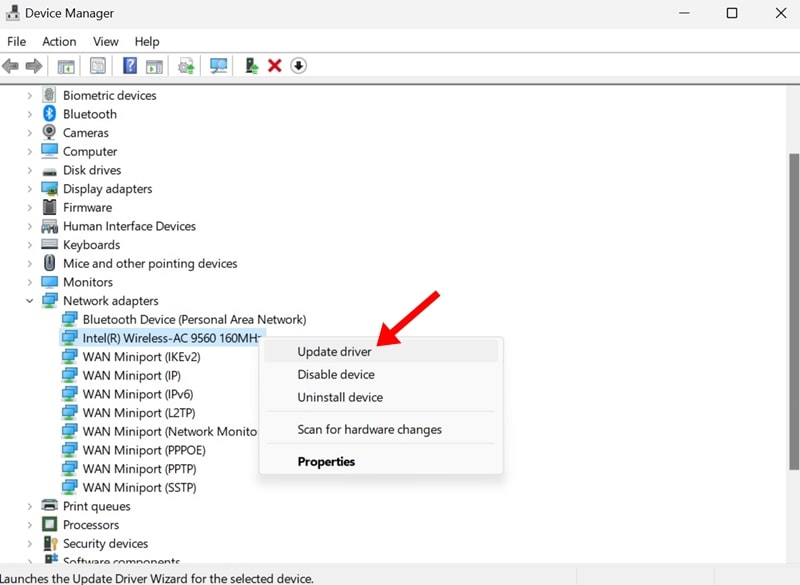
3. Next, right click on the connected network card and select Update Driver.

4. On the prompt that appears, Search automatically for drivers.

4. Manually Install the WiFi Drivers
If you’re using a dedicated WiFi card on your PC, you will have to download the most compatible driver from the official website.
You need to identify your WiFi card model, visit the manufacturer’s website, search for your WiFi card model and download the correct driver.
Once downloaded, you need to run the installer and follow the on-screen instructions.
5. Install the Windows Updates
Installing the pending Windows Update is important, especially after making the hardware changes.
Windows Updates enhance compatibility with the new hardware, improve system stability, and fix security loopholes.
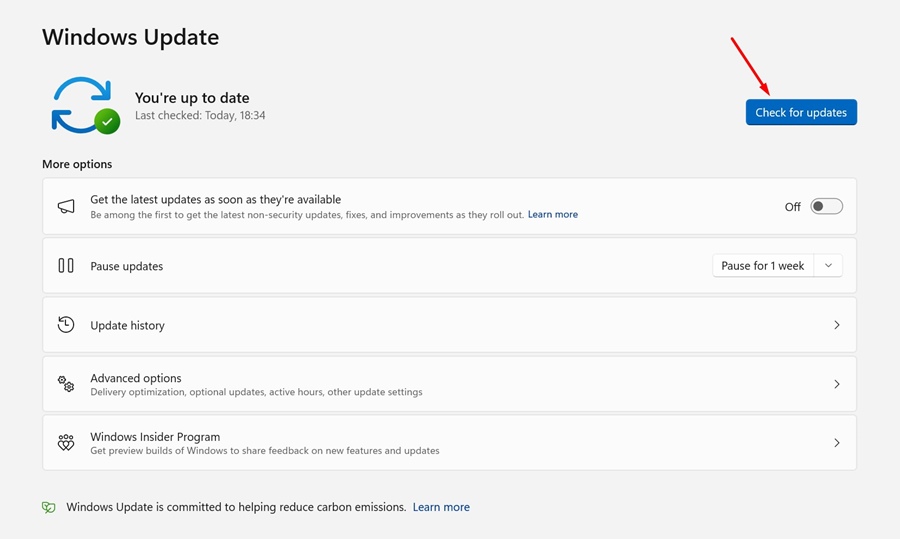

It will also help you rule out the network and driver issues by installing all required drivers. So, head to Settings > Windows Updates and click Check for Updates on the right side.
6. Reset the DNS on your PC
If you’re still experiencing internet issues, it’s time to reset the DNS on Windows. Here’s what you need to do.
1. Type CMD in Windows Search. Right click on the CMD and select Run as administrator.


2. When the Command Prompt opens, execute these commands one after another:
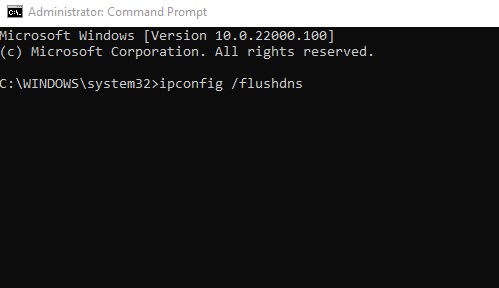

- ipconfig /flushdns
- ipconfig /registerdns
- ipconfig /release
- ipconfig /renew
- netsh winsock reset
After executing all commands, close the Command Prompt.
7. Reset the Network Settings
If nothing worked to fix your internet problems after changing SSD, it’s time to reset the Network Settings. Here’s what you need to do.
1. Launch the Settings app and switch to the Network & Internet tab.
2. On the right side, click Advanced Network Settings.
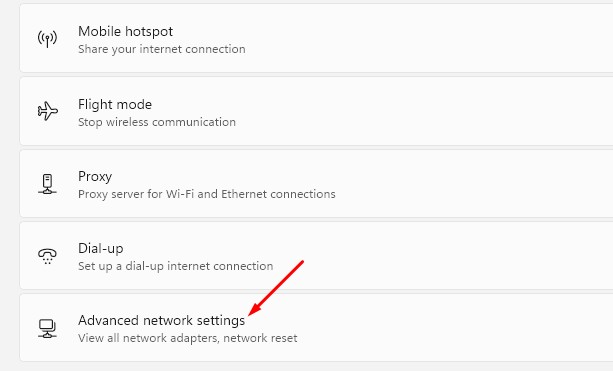

3. Next, click Network Reset.
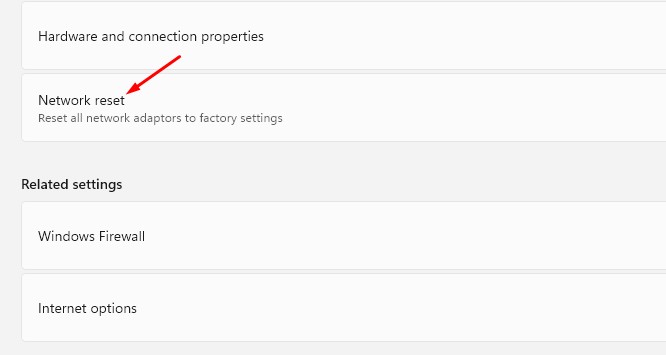

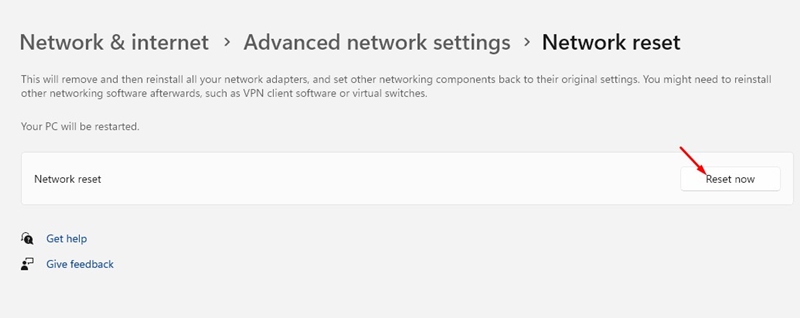
4. On the Network Reset screen, click on the Reset Now button on the Network Reset section.

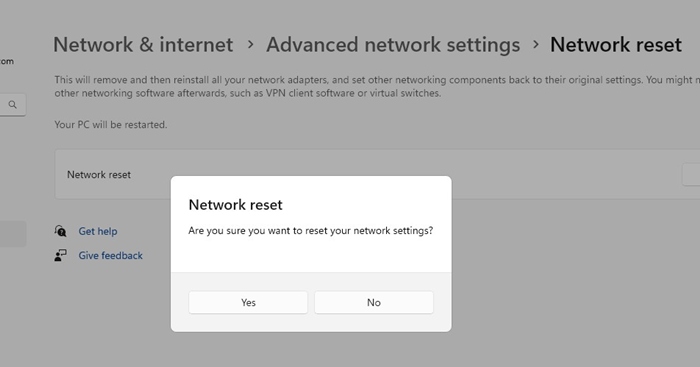
5. On the Network Reset confirmation prompt, Yes.

These are a few simple ways to fix internet problems with the new SSD on Windows. If you need more help with this topic, let us know in the comments below.
