To mount a folder as a drive in Windows 11, you need to use the built-in subst command. The subst command is mostly used for mounting drives on a file explorer. However, you should note a few things: the drives you will create will automatically unmount when you restart, shut down, or sign out from your user account.
Once unmounted, you need to mount the folder as a drive again in Windows 11 manually. You can repeat the process to mount a virtual drive or create a batch file and store it in the Startup folder to automate the process.
Hence, if you want to mount a folder as a drive in Windows 11, here’s what you need to do.
1. Mount Folder as a Drive in Windows 11
Here, we will create a shortcut file to mount a folder as a drive in Windows 11. Follow the simple steps we have shared below.
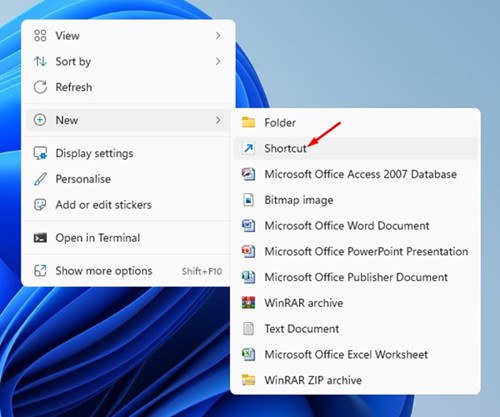
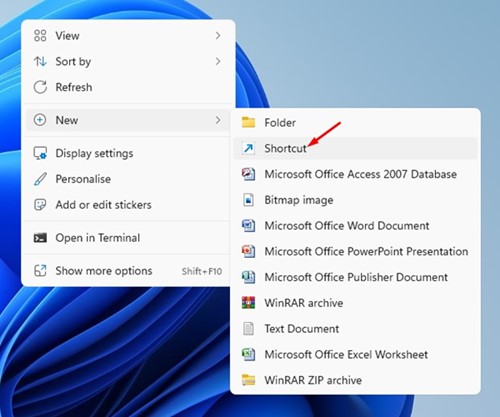
1. Right-click on a blank space and select New > Shortcut.

2. On the Create Shortcut wizard, type:
subst X: "C:\full_path_of_folder)"
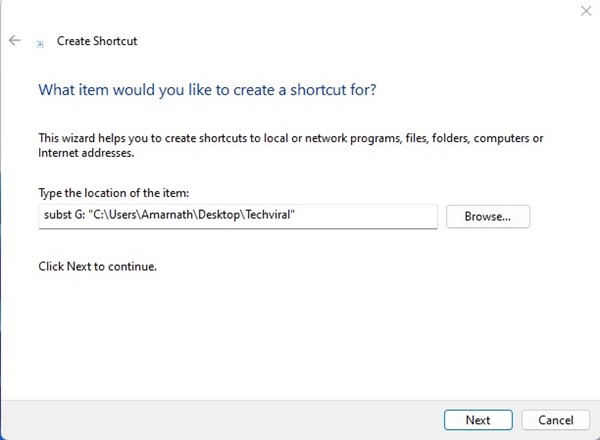

Important: Replace ‘X’ with the drive letter you want to assign (make sure the drive letter is not in use). Also, replace ‘C:\full_path_of_folder)’ with the path of the folder you want to mount as a drive.
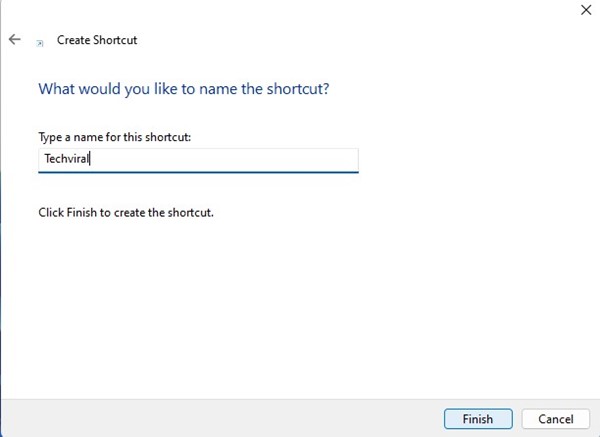
3. Once done, click on the Next button. On the Name, the shortcut window, type a name for the shortcut and click the Finish button.

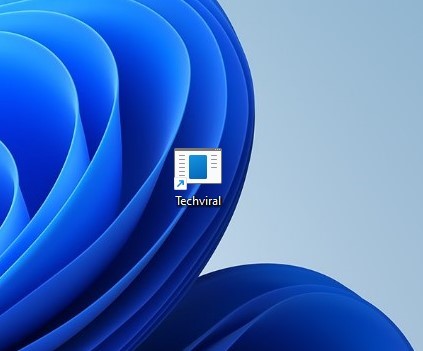
4. Now, you will see a new shortcut on your desktop screen. To mount your folder as a virtual drive, double-click on it. If the folder is not mounted, right-click on the shortcut and select Run as administrator.

5. If you want to unmount the virtual drive, restart your computer.
2. Automatically Mount folder as Drive in Windows 11 at Startup
As we mentioned, restarting the PC will unmount the drive from your computer. After the restart, you must rerun the shortcut file to mount your folder as a drive. If you want to automate that task, follow these steps.
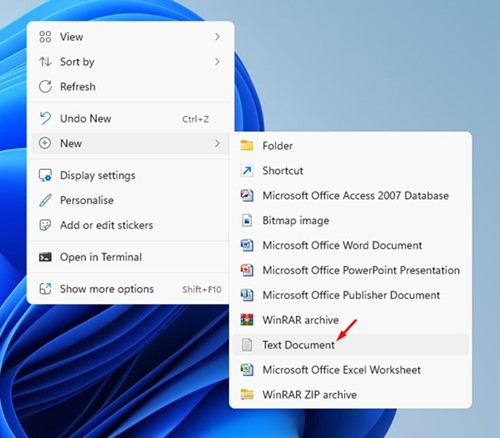
1. Right-click on your desktop and select New > Text Document.

2. On the Notepad, copy and paste the following code:
@subst X: “C:\complete_path_of_folder”
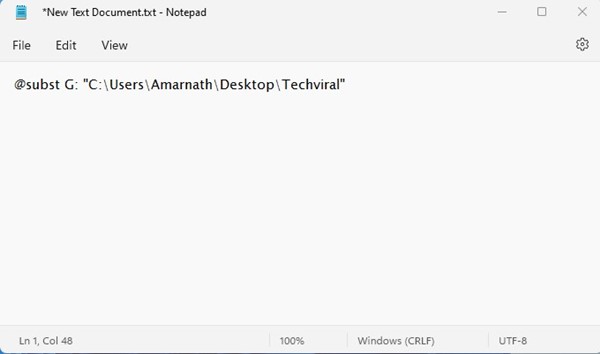

Important: Replace ‘X’ with the drive letter you want to assign (make sure the drive letter is not in use). Also, replace ‘C:\full_path_of_folder)’ with the path of the folder you want to mount as a drive.
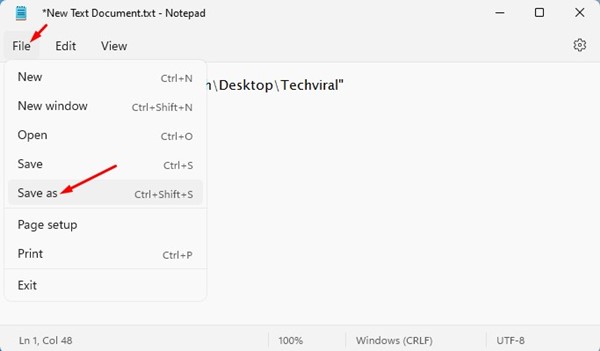
3. Once done, click on the File menu in the Notepad and select Save As.

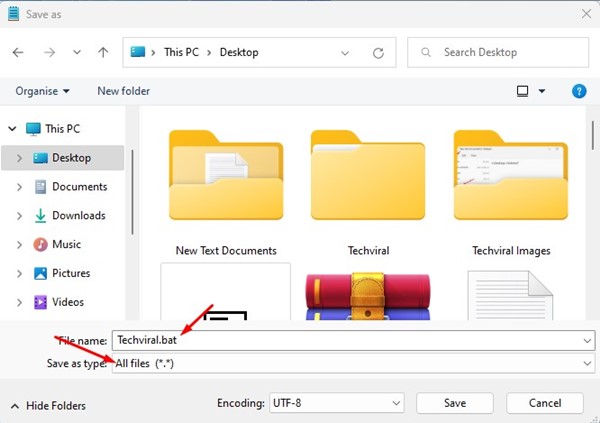
4. On the Save as prompt, enter the file name with the .bat extension. Select All files and click on the Save button on the Save as type.

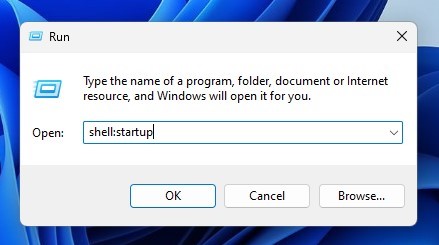
5. Now press the Windows Key + R button on your keyboard. On the Run dialog box, type shell:startup and press Enter.

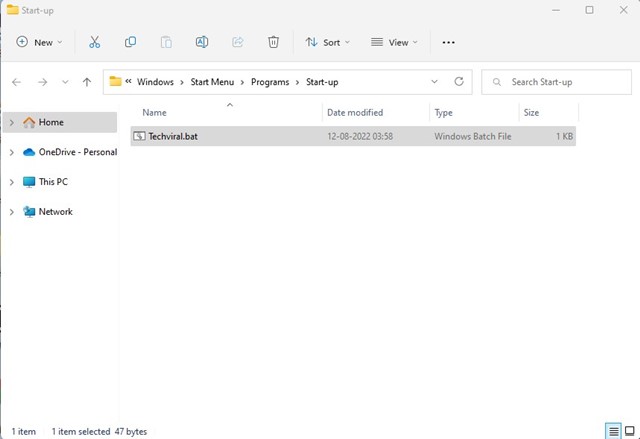
6. This will open the Startup folder on your computer. You need to copy and paste the batch file into this folder.

3. Mount Folder as Drive using Windows Terminal
You can even use the Windows Terminal to mount a folder as a drive. Here’s what you need to do.
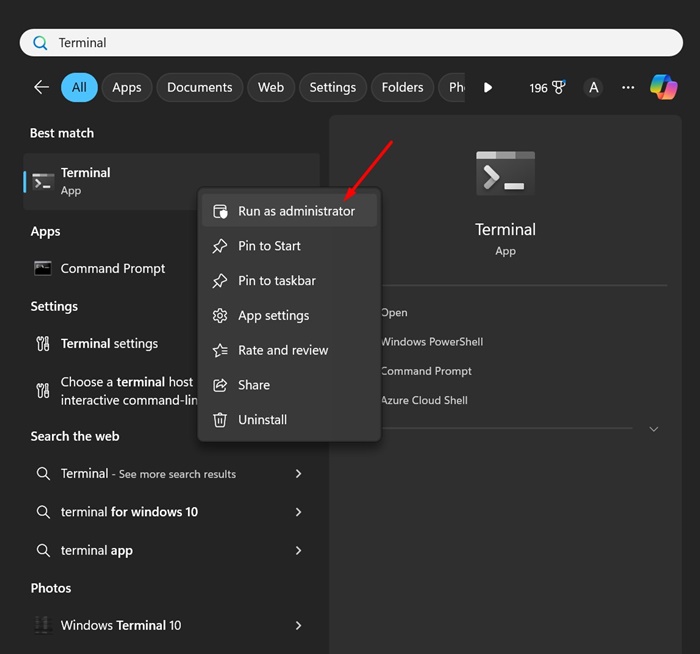
1. Type Terminal on Windows 11 Search. Next, right click on the Terminal and select Run as administrator.

2. When the Windows Terminal opens, execute this command:
subst <virtual drive letter>: "Full path of folder"
Note: Replace <virtual drive letter> with the drive letter you want to mount. Replace the Full path of the folder with the actual folder path.
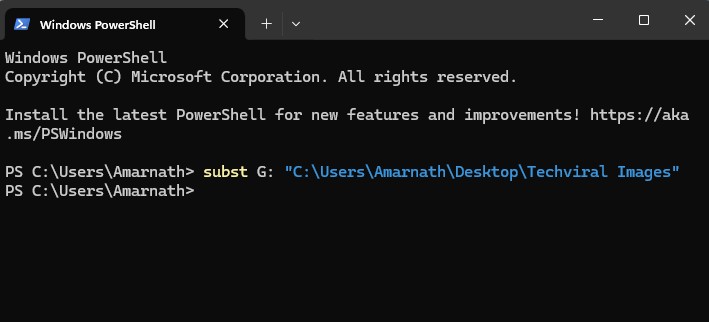

For example: subst G: “C:\Users\Amarnath\Desktop\Techviral Images”
3. Open File Explorer and you will find the folder mounted as a drive.
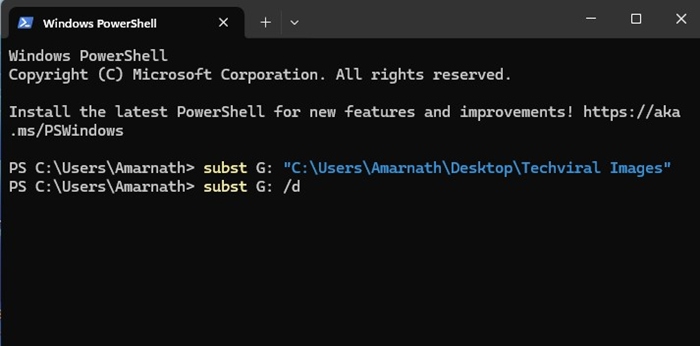
4. To unmount the drive, execute this command:
subst <virtual drive letter>: /d
Replace <virtual drive letter> with the mounted drive letter.

Also read: How to Format a Hard Drive or SSD in Windows 11
This guide is all about how to mount a folder as a drive on Windows 11 computer. If you frequently access a specific folder in Windows 11, you can mount it as a drive. If you need more help mounting a folder as a drive in Windows 11, let us know in the comments below.
