
Related Articles


You will concur with me that billboard advertisements are quite distinct from flyers, banners, logos, and even invitation cards. We are not just speculating on the size, but we are also considering the texts and fonts used for these write-ups. All of these are termed “typography.”
So what exactly is typography? The art of arranging type for readability and aesthetic appeal is known as typography. It includes choosing layout, space, typefaces, and sizes. Effective typography improves aesthetics and communication in a variety of media, including books, websites, and ads. For typographic designs to be both functional and aesthetically beautiful, an understanding of hierarchy, alignment, and contrast is essential.
In today’s modern world, there are many websites and applications that do this perfectly, and one of the leading apps is Photoshop. We’ll look at how to add text and fonts in Photoshop, modify the colour of text in Photoshop, and add custom fonts to your computer. Then, we’ll go over a cheaper and even simpler method for adding text to your photos with ZMO!
But first, let’s understand how to edit text in Photoshop.
How to Add Text and Fonts in Photoshop
Adding anything from a single letter to full paragraphs with a few clicks is made easy with Photoshop’s Type tool, which is an incredibly useful function. Adding text to posters and watermarking images are just two of the tasks covered in this guide on utilising Photoshop’s Type tool. It permits simple font, colour, and size changes in addition to text addition. In addition, it is easy to get recently installed fonts from Adobe Fonts or another website like Google Fonts.
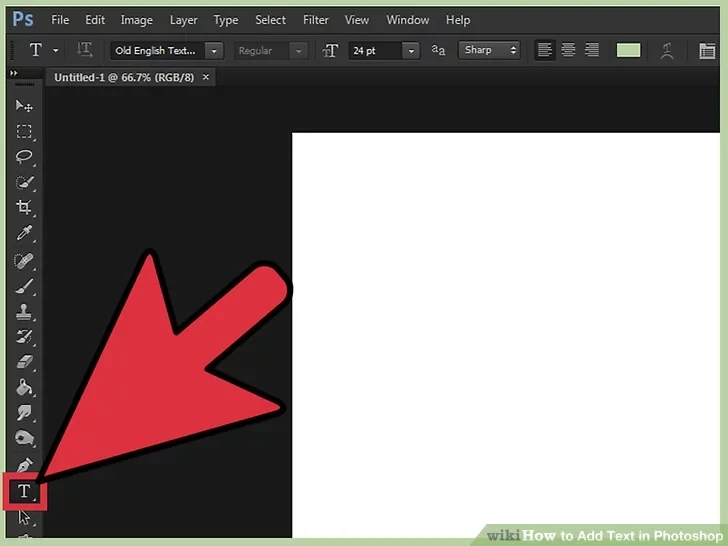
Step 1:
Once the picture you want to edit has been uploaded, go to the tools palette and choose the Type tool. It appears to be a “T.” To open the text tool, click on the icon or just hit “T” on your keyboard. You can now begin adding text anywhere you click in your image.
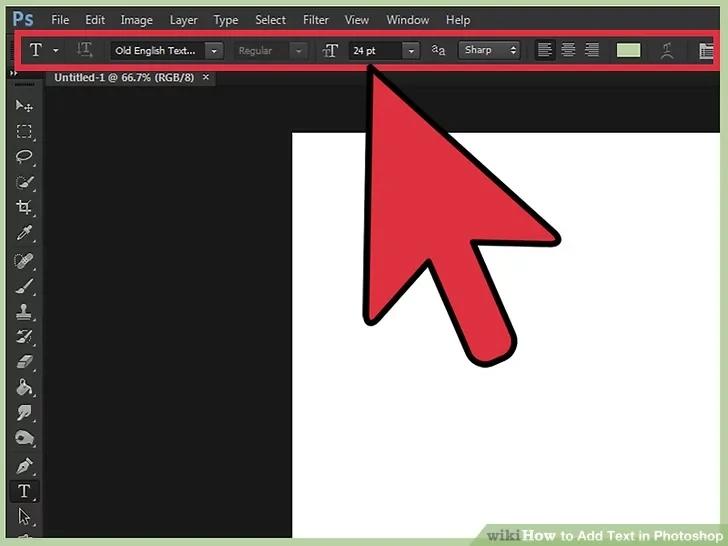
Step 2:
Customize your text preferences through the top menu in Photoshop. Upon selecting the Text tool, a range of options appears at the screen’s pinnacle, enabling colour, font, size, and alignment choices.
Utilise “Character” or “Paragraph” tools, resembling text-editing boxes in programmes like Microsoft Word, accessible via “Window” at the screen’s top.
Adjust font names, such as Arial and Times New Roman, font size points, alignment preferences (centred, right, or left), and font colour variations by selecting the respective options.
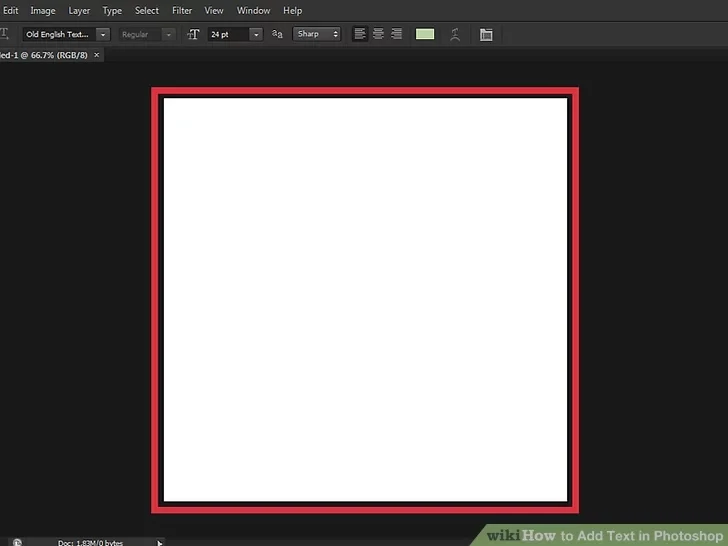
Step 3:
To insert text in Photoshop, click on the desired area of your image. Upon clicking, a cursor appears, marking the starting point for your text. Simply begin typing, and Photoshop will incorporate your words from this position. For straightforward text additions, this may suffice. Alternatively, if you are proficient with the pen tool, you can click along a path to write text along that line.
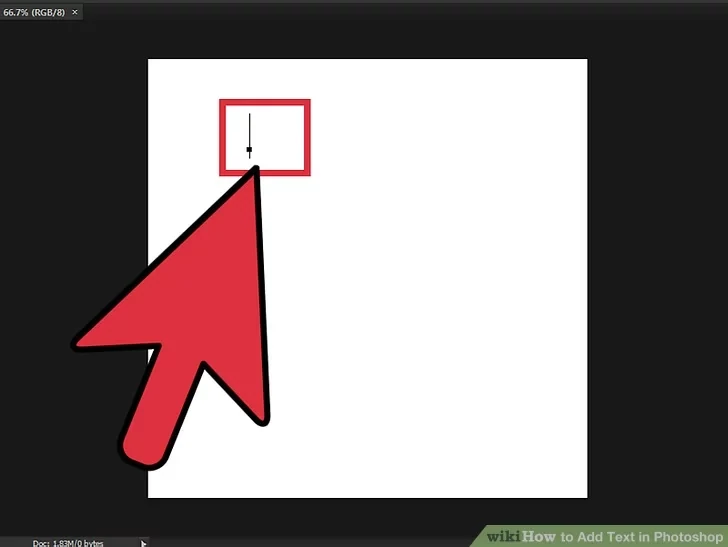
Step 4:
Before commencing typing, employ the text tool to click and drag, confining the text within a designated region. Should you require the text to align with a particular area, initiate typing after clicking and dragging to define the space. Text exceeding the allotted space will be concealed unless a font size reduction is applied.
Step 5:
To preview your text’s appearance on your Photoshop image, either click outside the text box or simultaneously press the Ctrl (Control) and Enter keys on your keyboard. If the text editor persists in initiating new text, switch to another tool.
For font and type edits, double-click on the text or click it again with the Text tool selected. To manually resize the text while the text layer is selected, press Ctrl-T or Cmd-T, eliminating the need to select new font sizes.
How to Add Text and Fonts in ZMO
Using text and fonts in ZMO is a smooth way to maximise the creative potential of your projects. With the help of this robust platform, you have a wide range of options for using striking typography to convey your ideas. Learning how to add text and experiment with fonts in ZMO is a key skill, regardless of whether your goals are to improve a social media post, create a captivating presentation, or modify your digital content. We’ll go into the detailed procedure in this tutorial, enabling you to use the features and let your imagination run wild with the wide variety of text and font choices.
Step 1:
Navigate to ZMO’s photo editor website, which should look like the image below:

Step 2:
The next step is to upload the picture you want to edit and add text.

For this guide, we will use the picture below:

Step 3:
After uploading your picture, you will observe that the background of your picture is plain thanks to ZMO’s background changer. However, we can circumvent this by clicking on the “Add Image” icon on the left side of the screen.
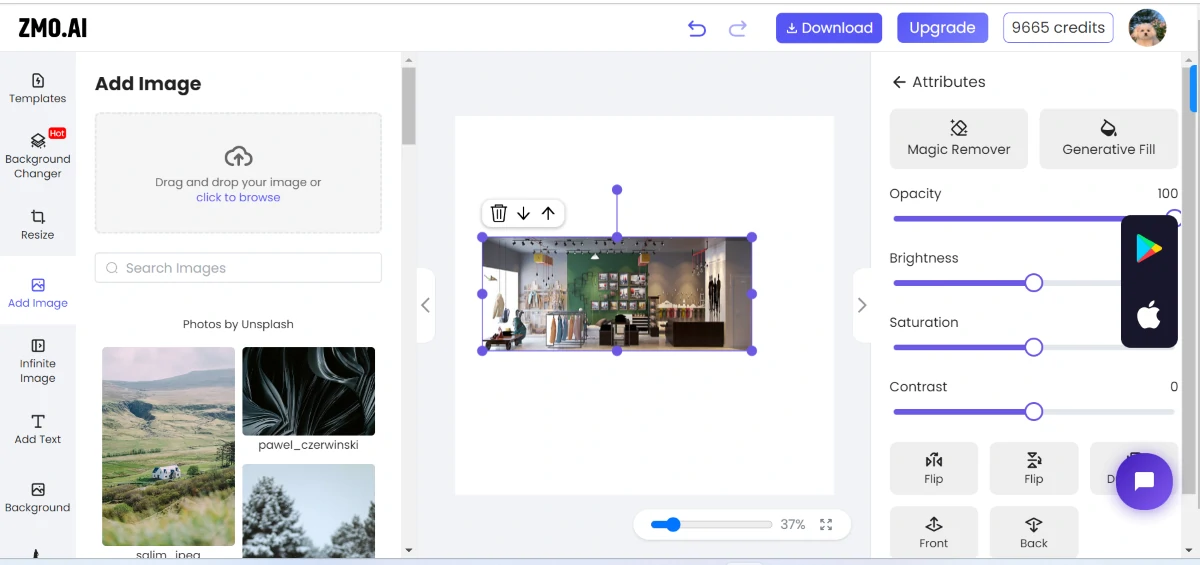
Once uploaded, you can expand your picture to fill the canvas area for better visuals.
Step 4:
The next step is to add our texts. Let’s add this phrase: “Auburn Eve: Your Home of Creative Diversity.” Click on the “Add Text” icon just below the “Add Image” portion.

You can write your original text and choose one or more of the 37 stylish fonts ZMO provides.
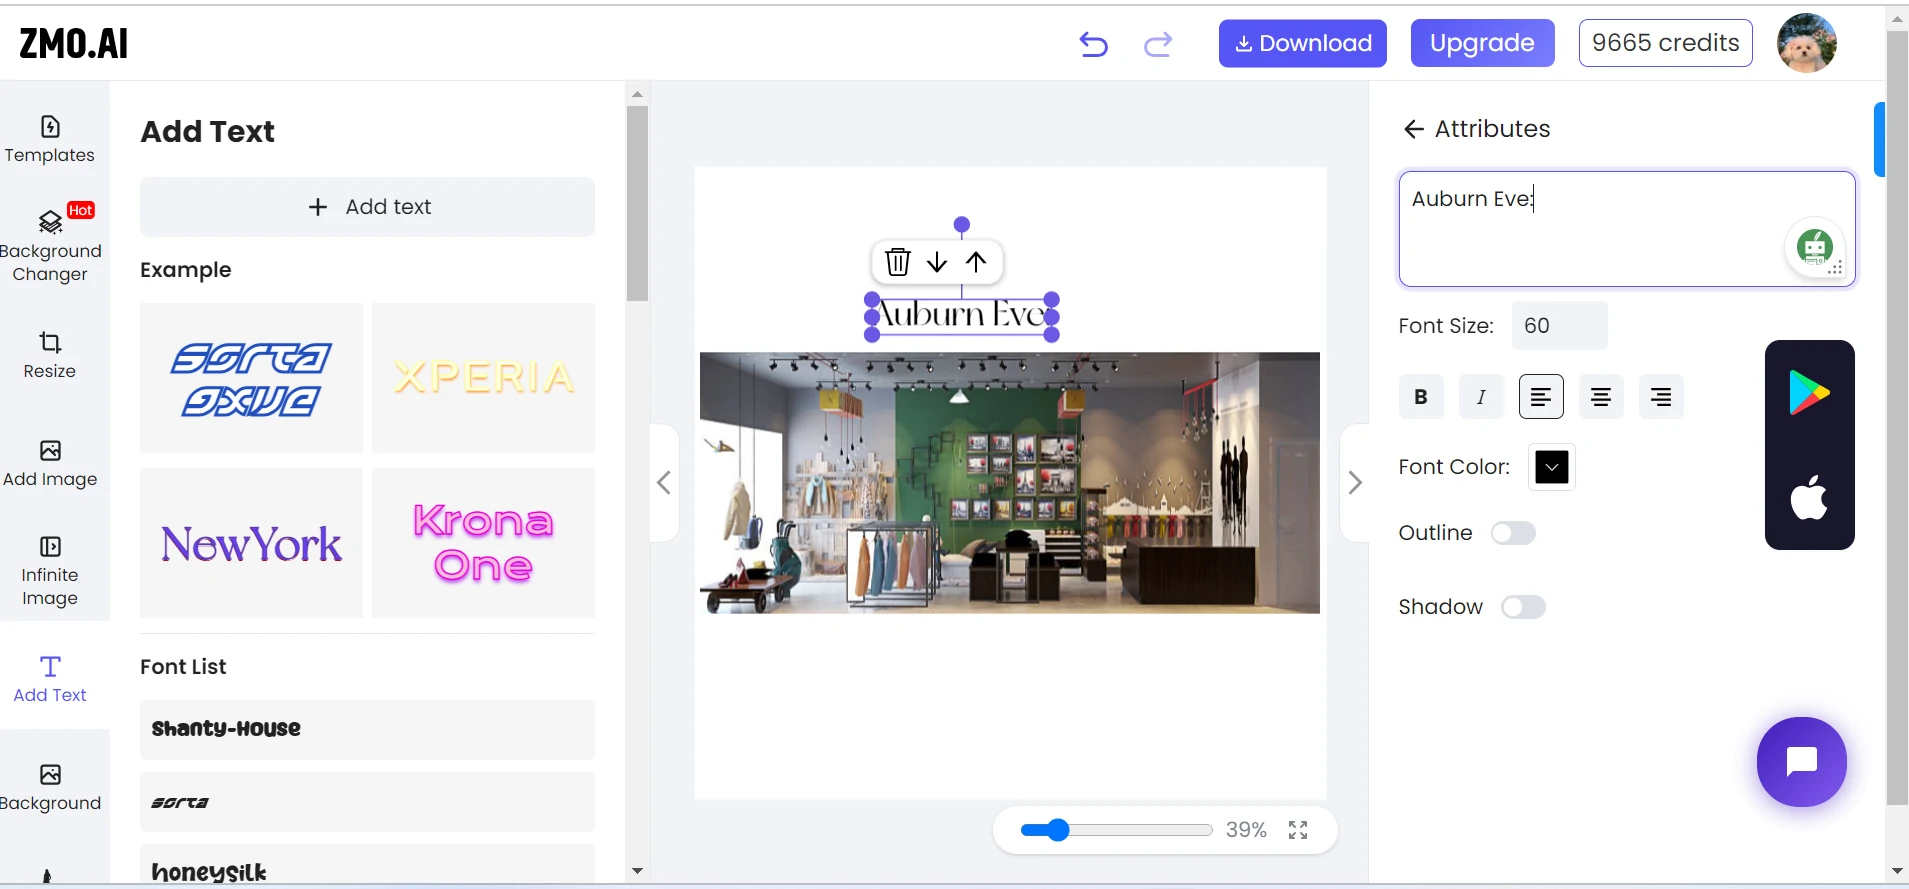
Step 5:
Once a part of the text is added, you can increase or decrease the font size until it suits your desired size. You can also make it bold and choose a font colour.
After proper editing, we should have something similar to this:
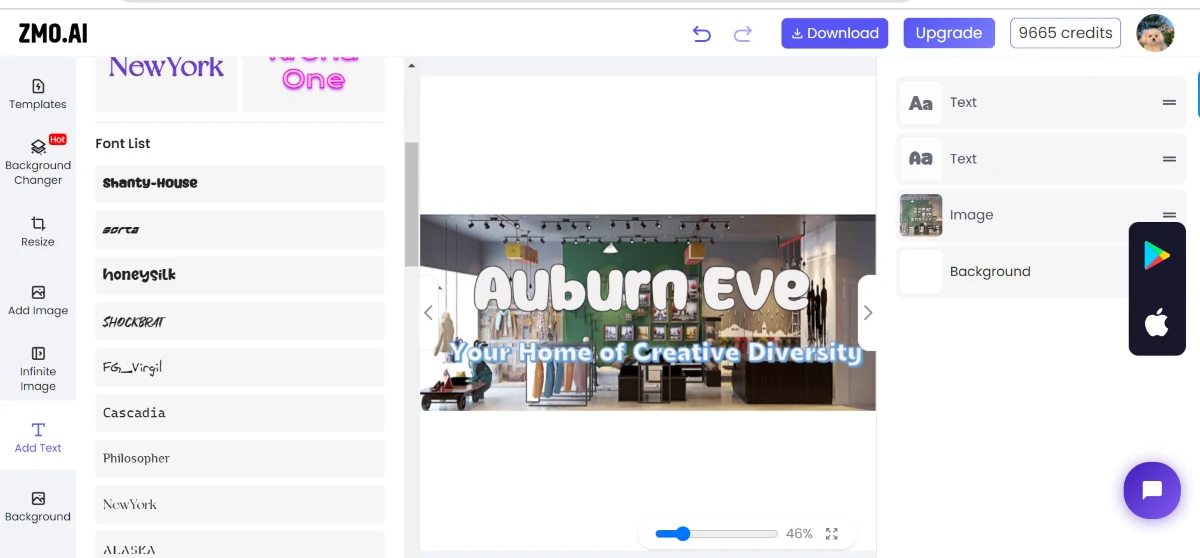
Step 6:
Check and make sure your image and text have been properly aligned and the margins are perfect. After all corrections have been made and properly edited, you can proceed to download it to your internal memory or share it at your desired location.
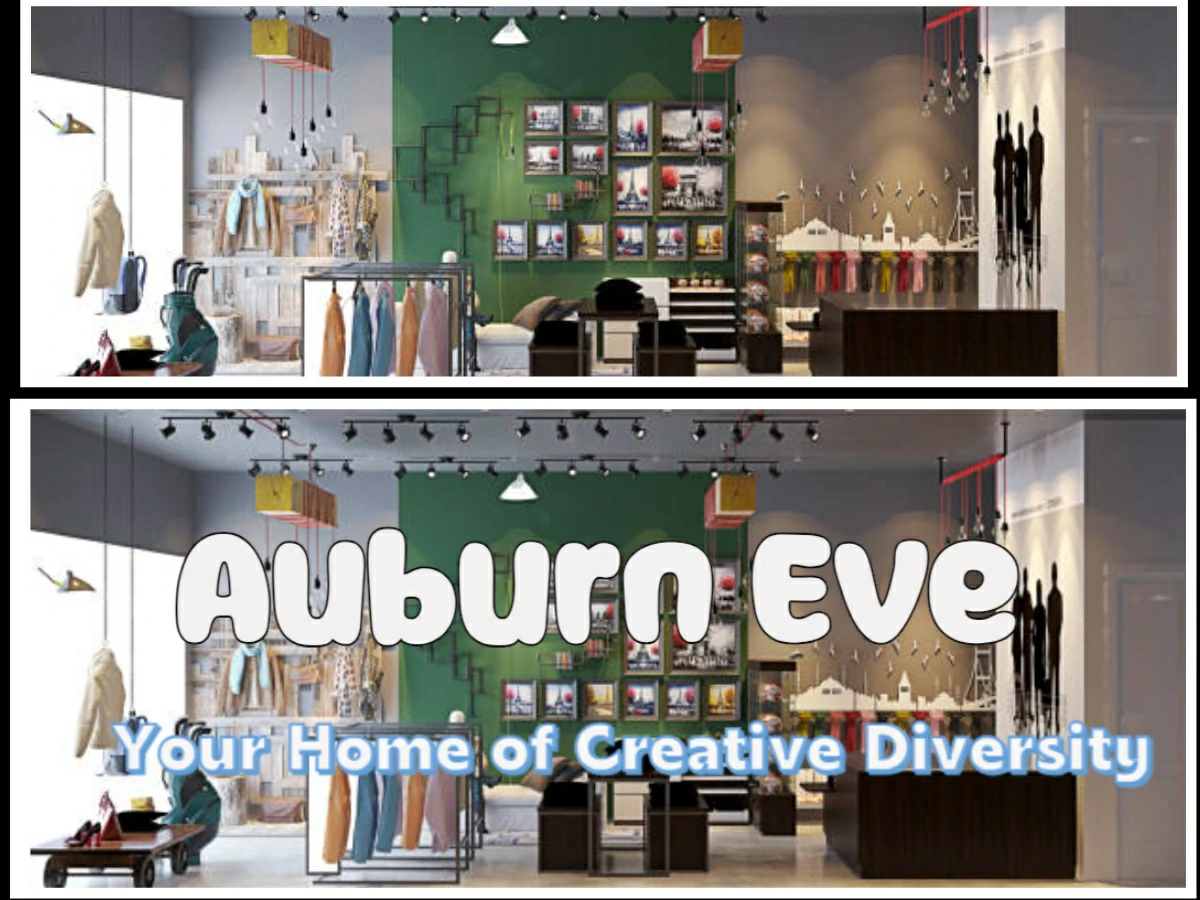
Here’s our result:

In comparison:
Factors to Consider when Adding Text in ZMO’s Photo Editor
Depending on the purpose of your design, you may also want to consider the overall balance and visual hierarchy of your composition when using ZMO’s photo editor. Ensure that key elements are appropriately emphasised and that there is a clear flow for the viewer’s eye to follow.
Additionally, pay attention to the colour scheme, typography, and overall aesthetics to maintain a cohesive and pleasing design. Consistency in these elements can enhance the professional and polished appearance of your project.
Consider testing your design across various devices and screen sizes to ensure responsiveness and adaptability. This will help guarantee that your visual elements are presented effectively across different platforms and devices.
Lastly, seek feedback from others or conduct usability testing to gather insights on how users interact with your design. This can provide valuable perspectives and help you make informed decisions for further improvements.
Remember, the success of your design lies not only in its visual appeal but also in its functionality and user experience.
Conclusion:
The ability to effectively add fonts, edit texts, and make adjustments in Photoshop and ZMO empowers users to create eye-catching designs with impactful typographic details. A thorough understanding of layout details, such as typefaces, proportions, and spatial considerations, is necessary for both the practical and aesthetic aspects.
Paying close attention to alignment, margins, and visual hierarchy becomes crucial when using ZMO’s user-friendly interface or Photoshop’s extensive feature set. Reliability, flexibility, and judgement based on user input all play a part in the successful implementation of designs, which guarantees a classy and expert conclusion. It is crucial to remember that the pinnacle of design excellence lies not only in aesthetic beauty but also in the skillful fusion of usefulness and user experience.
Frequently Asked Questions
- How Can I Add Custom Fonts to Photoshop?
To incorporate custom fonts, download them from reputable websites like Adobe Fonts or Google Fonts. Install the fonts on your computer, and Photoshop will automatically recognize and make them available for use in your projects through the Text tool.
- Can I Resize Text in Zmo’s Photo Editor?
Yes, in ZMO’s photo editor, you can easily resize text. After adding text, simply select the text element, and using the provided options, adjust the font size to your desired dimensions, allowing for flexible and customised text placement within your visual composition.
- How Do I Ensure Responsive Design in ZMO?
Achieving responsive design in ZMO involves testing your project across various devices and screen sizes. This ensures that your text and images are presented optimally on different platforms, enhancing the overall user experience and maintaining consistency in visual appeal across diverse viewing environments.
