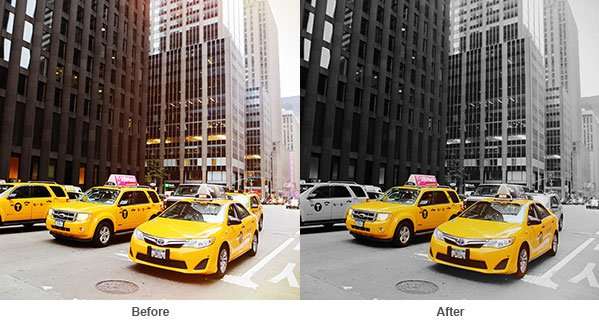
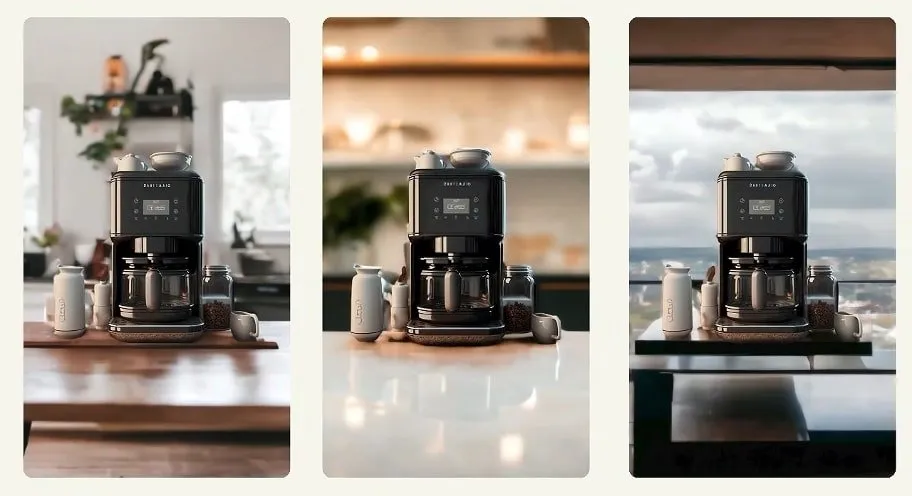
Introduction: How to Change a Background in Photoshop?
In the dynamic world of digital designing and photo editing, one of the most common, yet impactful techniques is the ability to change the background of an image. But why is this procedure so crucial? Let’s dive deeper to understand!

- How to Change a Background in Photoshop?
- Understanding the Importance of Backgrounds
- Influence of Background on Image Quality
- Conveying the Right Mood with Backgrounds
- Preparation Before Changing Backgroun
- Gathering Necessary Tool
- Selecting Suitable Replacement Background
- Step-by-Step Guide to Changing Background
- Step 1 – Opening the Image in Photoshop
- Step 2 – Selecting the Background
- Step 3 – Removing the Original Background
- Step 4 – Inserting the New Background
- Step 5 – Fine-tuning and Saving Your Work
- Common Mistakes and How to Avoid Them
- Inconsistent Lighting
- Unnatural Color Grades
- Additional Tools to Aid in Background Changing
- Profiling ZMO.AI’s Background Changer Tool
- Conclusion
- Frequently Asked Questions
Understanding the Importance of Backgrounds
Influence of Background on Image Quality
The background of an image can make a significant difference in how your subject is perceived. It can either compliment and enhance your subject or drown it in unnecessary noise and distractions. So, taking the reins of your image’s setting can ensure that the attention remains squarely where it should be – on your main subject.

Conveying the Right Mood with Backgrounds
Backgrounds serve a critical role that extends far beyond just being placeholders. They impart depth to a composition, essentially setting the scene and establishing the mood. In much the same way a soundtrack could radically shape the ambiance of a film, the background of a photograph guides the emotional reaction of the viewer. It subconsciously directs them, establishing a context and a tone that impacts their perception of the central focus.
When you decide to alter the background, it can drastically change the perception of your creations. It’s the subtle shift in mood or setting that can inject new emotion or significance into an image. Similar to remixing a song with a different background track, changing the backdrop of a picture or design can metamorphosize the entire narrative, compelling viewers to see the creation in a brand new light. Hence, backgrounds are instrumental in influencing how art communicates visually with the viewer.
Preparation Before Changing Background
Gathering Necessary Tools
Before immersing yourself in the process of background alteration, it’s vital to assemble your creative arsenal. This set of tools primarily includes a working version of Photoshop, ensuring your image files are in a compatible format, and finally, your new background image. Keep in mind, the new background should be high-resolution to avoid any unwanted pixelation or quality loss in your final product.
Selecting Suitable Replacement Background
When choosing a replacement background, consider both – aesthetics and practical variables. You want to pick a background that complements your subject and the mood of the image. Besides, it’s important to ensure that the lighting and angle of the background match with that of the main subject. An inappropriate choice could lead to an unnatural-looking result, distracting from the primary focus.
Step-by-Step Guide to Changing Background

Step 1 – Opening the Image in Photoshop
Kick-off your editing process by opening your image in Photoshop. Navigate to ‘File’ and then ‘Open,’ pinpoint your image in the explorer and confirm your selection. Your selected image will appear ready for some background-changing action.
Step 2 – Selecting the Background
The magic wand tool or quick selection tool will be your best friends here. With these tools, you can pinpoint the areas that you want to replace. Multiple selection options in Photoshop help ensure you get this step precisely as desired.
Step 3 – Removing the Original Background
Now that you have made the selection, it’s time to remove the original background. You can do this by inverting your selection (Select->Inverse) and using the ‘Layer via Cut’ option in the Layers panel. You’ll be left with your main subject isolated and a transparent background.
Step 4 – Inserting the New Background
Next, open the image you’ve chosen as your new background. Copy and paste it onto your working canvas, resizing and repositioning it to fit perfectly behind your main subject. The handy transform tool can assist with this.
Step 5 – Fine-tuning and Saving Your Work
Fine-tune your image by refining the edges of your main subject and adjusting the contrast, lighting, and colors to match the new background. This step is crucial for polishing your work and ensuring a natural, cohesive look. And with that, you’re done! Save your masterpiece and bask in the joy of having successfully altered your image background.
Common Mistakes and How to Avoid Them
Inconsistent Lighting
Changing backgrounds in a composition often leads to the common pitfall of inconsistent lighting. The incongruity occurs when illumination doesn’t match between the subject and its background. For instance, if your subject is lit from the left side but your chosen background has the light source from the right side, it creates a distracting mismatch. This disparity is often picked up by viewers, drawing their attention away from the main subject and negatively altering the overall visual impact.
To circumnavigate this challenge, the key lies in meticulous attention to the lighting direction while selecting the background. The aim here is to achieve a congruent lighting effect between the subject and the new backdrop. Tools like Photoshop offer features for altering and balancing light to ensure a harmonious blend. By carefully adjusting these elements, it’s possible to create a totally integrated and visually appealing composition where the subject naturally fits into its new environment.

Unnatural Color Grades
A recurring error in photo editing is the creation of an unnatural color contrast between the subject of an image and its new background. This is commonly observed when a subject, originally photographed in bright daylight, is imposed onto a background that represents a different time of day, like dawn or dusk. This discrepancy in the lighting conditions leads to a stark disparity in the colors of the subject and the background which can make the edited photo appear awkward and unrealistic.
The solution to this issue lies in careful manipulation of color balance and saturation levels. In editing, it’s essential to adjust these elements to synchronize the foreground and the background in terms of their color tones. This ensures an alignment of light intensity and color hue across the image, making both the foreground and background appear as integral parts of the same picture. Thus, thorough color correction can help create a more visually congruent and effective image.

Profiling ZMO.AI’s Background Changer Tool
The process of changing a background in Photoshop can indeed be detailed and complex to follow, and sometimes we may seek a simpler alternative. That’s where ZMO.AI’s Background Changer comes in handy. Using state-of-the-art AI algorithms, it’s a tool that caters not just to the professionals, but to those who lack the intricate skills or simply do not have the time to manually handle such an editing task on Photoshop.
The brilliance of this tool lies in its capability to deliver flawless, quality transitions between backgrounds. It accomplishes this while omitting the need for detailed, manual work that one can often get lost in. Another notable feature is its vast library of backgrounds you can choose from. But the flexibility doesn’t stop there – users also have the option to upload their own backgrounds, further personalizing their experience and ensuring every output is tailor-fit to their preferences.
Conclusion
Changing a background in Photoshop can transform the look and feel of your images, allowing you to manipulate the mood, style, and overall impact. Despite the potential pitfalls, with careful preparation and attention to detail, you can avoid common mistakes and achieve a natural, appealing look. If you seek a quicker alternative, consider using tools like ZMO.AI‘s Background Changer to ease the process.
Frequently Asked Questions
Q1: Why is the choice of background essential in image editing?
Choosing a suitable background is paramount to ensure that the subject stands out and the desired mood is conveyed. A well-chosen background amplifies the narrative, creates depth, and enhances visual appeal.
Q2: What tools do I need before starting the background change process in Photoshop?
You need a working version of Adobe Photoshop and the image files you intend to work with: the primary image and the replacement background. The latter should ideally be high-resolution to prevent quality loss.
Q3: What are common mistakes to avoid when changing a background in Photoshop?
Common mistakes include inconsistent lighting between the new background and the subject, and unnatural color contrasts. Address these issues by focusing on lighting consistency and manipulating color balance and saturation to make the image elements cohesive.
Q4: Can ZMO.AI’s Background Changer help with the process?
Absolutely! ZMO.AI’s Background Changer is a powerful tool that utilizes AI algorithms to provide seamless, high-quality background changes. It saves time as you don’t need step-by-step manual work, as in Photoshop. You can choose a new background from the given library or upload your own image.
Q5: Do I need advanced Photoshop skills to change the background of an image?
While having advanced Photoshop skills can streamline the process and provide more control over fine details, basic Photoshop skills are usually sufficient for a standard background change. However, tools like ZMO.AI’s Background Changer can simplify background changes, requiring no Photoshop skills at all.


