Microsoft’s Windows 11 is a great desktop operating system; it has fewer bugs than the previous versions of Windows and offers many new features.
On the Windows operating system, you get a built-in security tool called Windows Security. Windows Security is also available on the latest Windows 11, protecting computers from various threats.
Windows Security also has exploit protection, ransomware protection, and more. Not many would know, but Windows Security also has an Offline Scan option that can detect & remove stubborn viruses easily.
In this article, we will discuss the Windows Security Offline Scan, what it does, and how you can use it to remove hidden viruses & malware from your PC. Let’s get started.
Also Read: Download Microsoft Defender – Windows, macOS, Android, and iOS
What is Windows Security Offline Scan?
The offline scan mode on Windows Security or Microsoft Defender is basically an anti-malware scanning tool that lets you boot and run a scan from a trusted environment.
It actually runs the scan from outside the normal Windows Kernel to target malware that attempts to bypass the Windows Shell.
The offline scan mode is especially helpful if your device is infected with hard-to-remove malware, and removing it while Windows is fully loaded is not possible.
So, what the scan does is boot your computer into Windows Recovery Environment and run the scan to remove malware that prevents normal startup.
How to Do Offline Virus Scan with Windows Security on Windows 11?
You may want to run it now that you know what Offline Scan mode does. If you feel that your PC has a stubborn virus, you should run the Windows Security offline scan on Windows 11. Here’s what you need to do.
1. Type in Windows Security on the Search. Next, open the Windows Security app from the list of best-match results.
2. When the Windows Security app opens, click on Virus & Threat Protection.
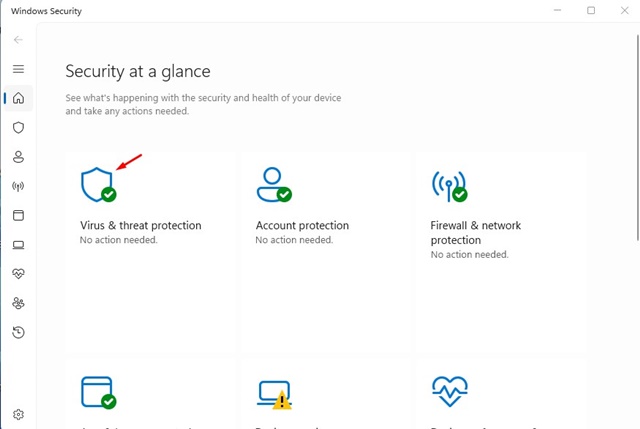
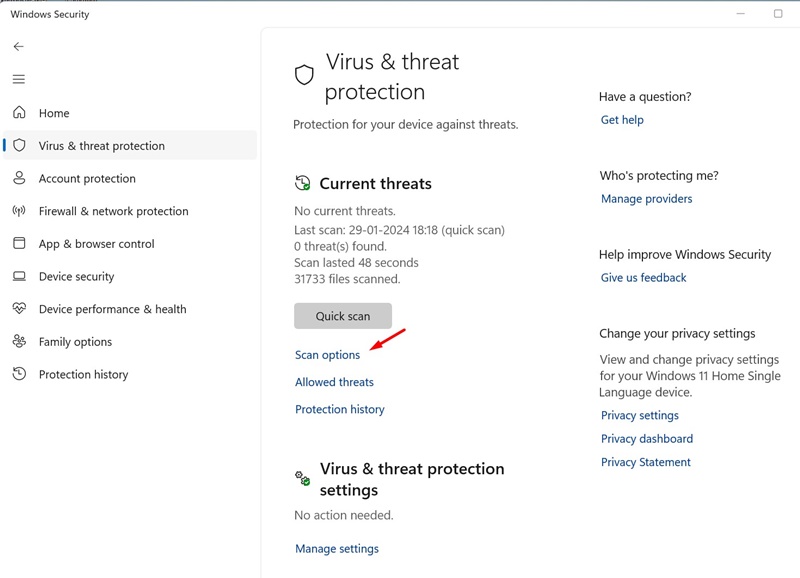
3. Now, on the Current Threats section, click on Scan options.
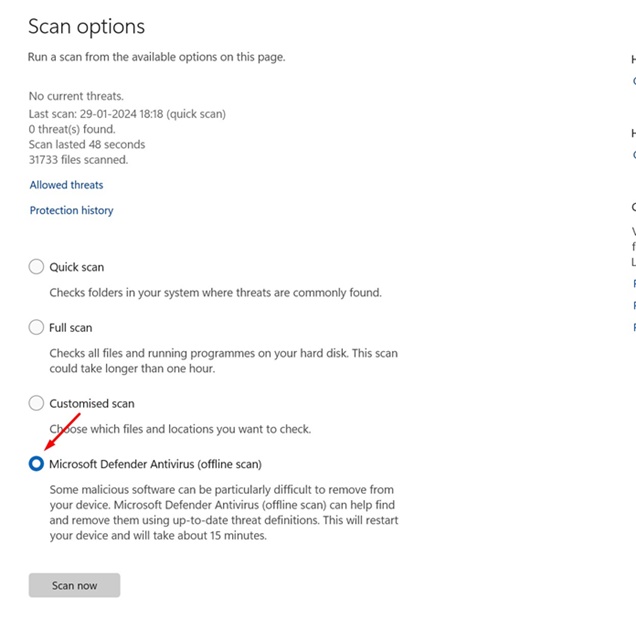
4. On the next screen, select Microsoft Defender Antivirus (Offline Scan) and click Scan Now.
5. On the confirmation prompt, click the Scan button.
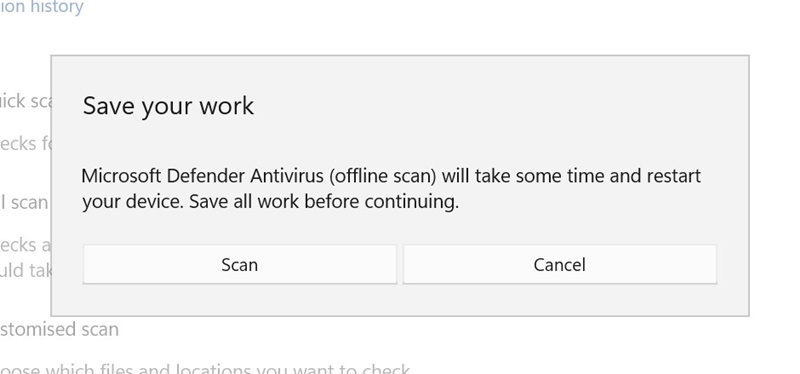
That’s it! Once you complete the steps, your Windows 11 device will restart into the WinRE. On the Windows Recovery Environment, a command line version of Microsoft Defender Antivirus will run without loading any of the system files.
The offline scan will take around 15 minutes to computer. Once the scan is completed, your PC will restart automatically.
How to Check the Microsoft Defender Offline Scan Results
After the restart, you can easily check the Microsoft Defender Antivirus offline scan results. For that, follow the steps we have mentioned below.
1. Open the Windows Security app on your Windows 11 computer.
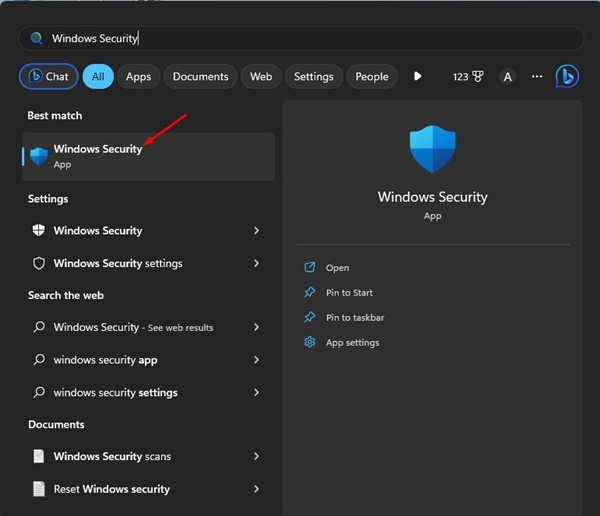
2. When the Windows Security app opens, click on Virus & Threat Protection.

3. In the Current Threats section, click on Protection History.
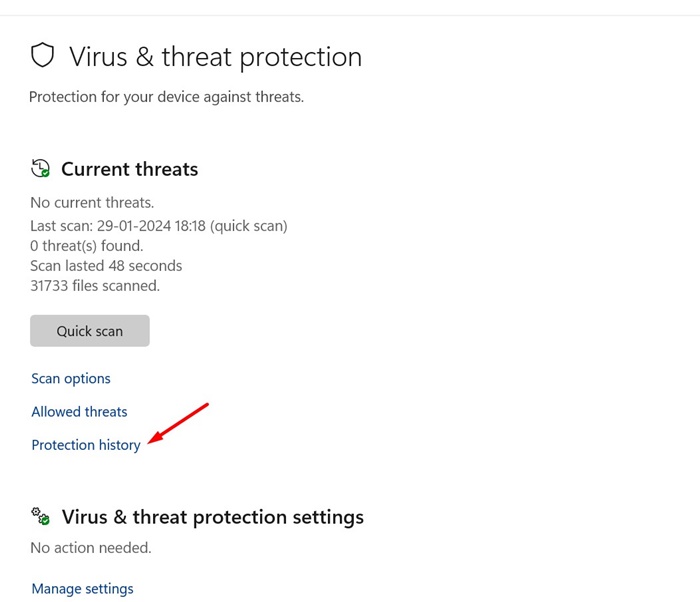
4. Now, you will be able to check the scan results.
That’s it! This is how you can review the Microsoft Defender offline scan results.
So, this guide is about how to do an offline virus scan with Microsoft Defender antivirus on Windows 11. If you have any doubts about the offline scan or need further help, let us know in the comments below.
 Moridom Digital Agency Agency for Everything Digital


